
What are Priority Requests?
Priority Requests allow players to submit scene requests during ERLC sessions.Staff can approve or deny these requests, and the system automatically manages cooldowns, limits, and notifications.
This helps maintain fair scene distribution and prevents players from starting scenes without approval.
How to use Priority Requests
You can configure Priority Requests from your
ERLC Integration → API page, located beneath Team Jurisdictions.
ERLC Integration → API page, located beneath Team Jurisdictions.
Configuration Options
1
Enable Priority Request Module
Toggle this setting to turn the feature on or off.
When enabled, players can submit priority requests using the provided link.
When enabled, players can submit priority requests using the provided link.
2
Discord Channel
Select the channel where priority request notifications should be sent.
3
Blacklisted Roles
Choose roles that are not allowed to submit priority requests.
4
Minimum and Maximum Players
Set the minimum number of players required before requests are allowed.
Set the maximum number of players allowed in a scene.
Set the maximum number of players allowed in a scene.
5
Priority Cooldown
Configure how long the server must wait between approved priority scenes.
This prevents back to back scenes.
This prevents back to back scenes.
6
User Request Cooldown
Set how long a player must wait before submitting another request.
This helps prevent spam and ensures fairness.
This helps prevent spam and ensures fairness.
7
Mentioned Roles
Select roles that should be mentioned when a priority request is submitted.
8
Message Type
Choose what type of message should be sent in ERLC when a priority timer starts.
If set to Disabled, no in game message will be sent.
If set to Disabled, no in game message will be sent.
9
Manage Priority Presets
Open the panel to view pending, create, and manage Priority Presets.
Users can select a preset instead of manually typing out their request.
10
Copy Link to Priority Request Page
Use this button to copy the link that players will use to submit priority requests.
Share it in your Discord server or session channels.
Share it in your Discord server or session channels.
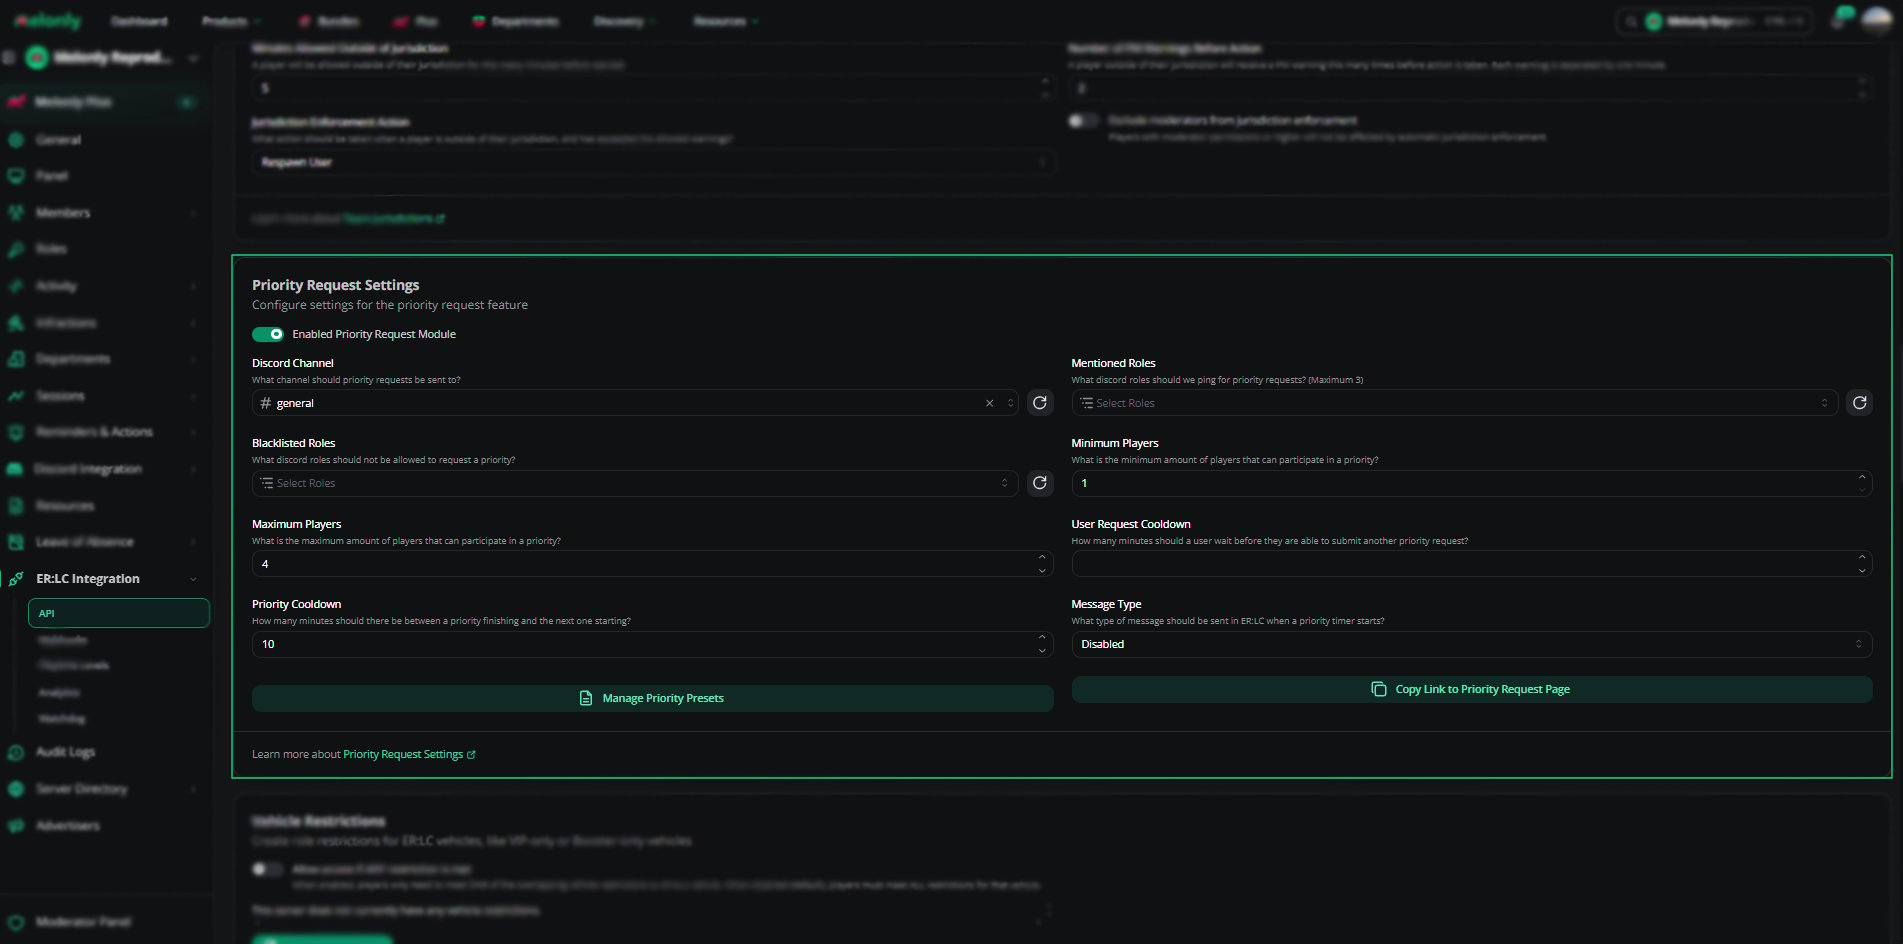
Configuration
Priority Presets
Priority presets allow you to create predefined scene types that players can select when submitting a request.1
Create a New Preset
Open the preset editor and enter a name and description for the preset.
For example, Hostage Scene or Bank Robbery.
For example, Hostage Scene or Bank Robbery.
2
Save the Preset
Click Save to add the preset to your list.
Players will now be able to select it when submitting a request.
Players will now be able to select it when submitting a request.
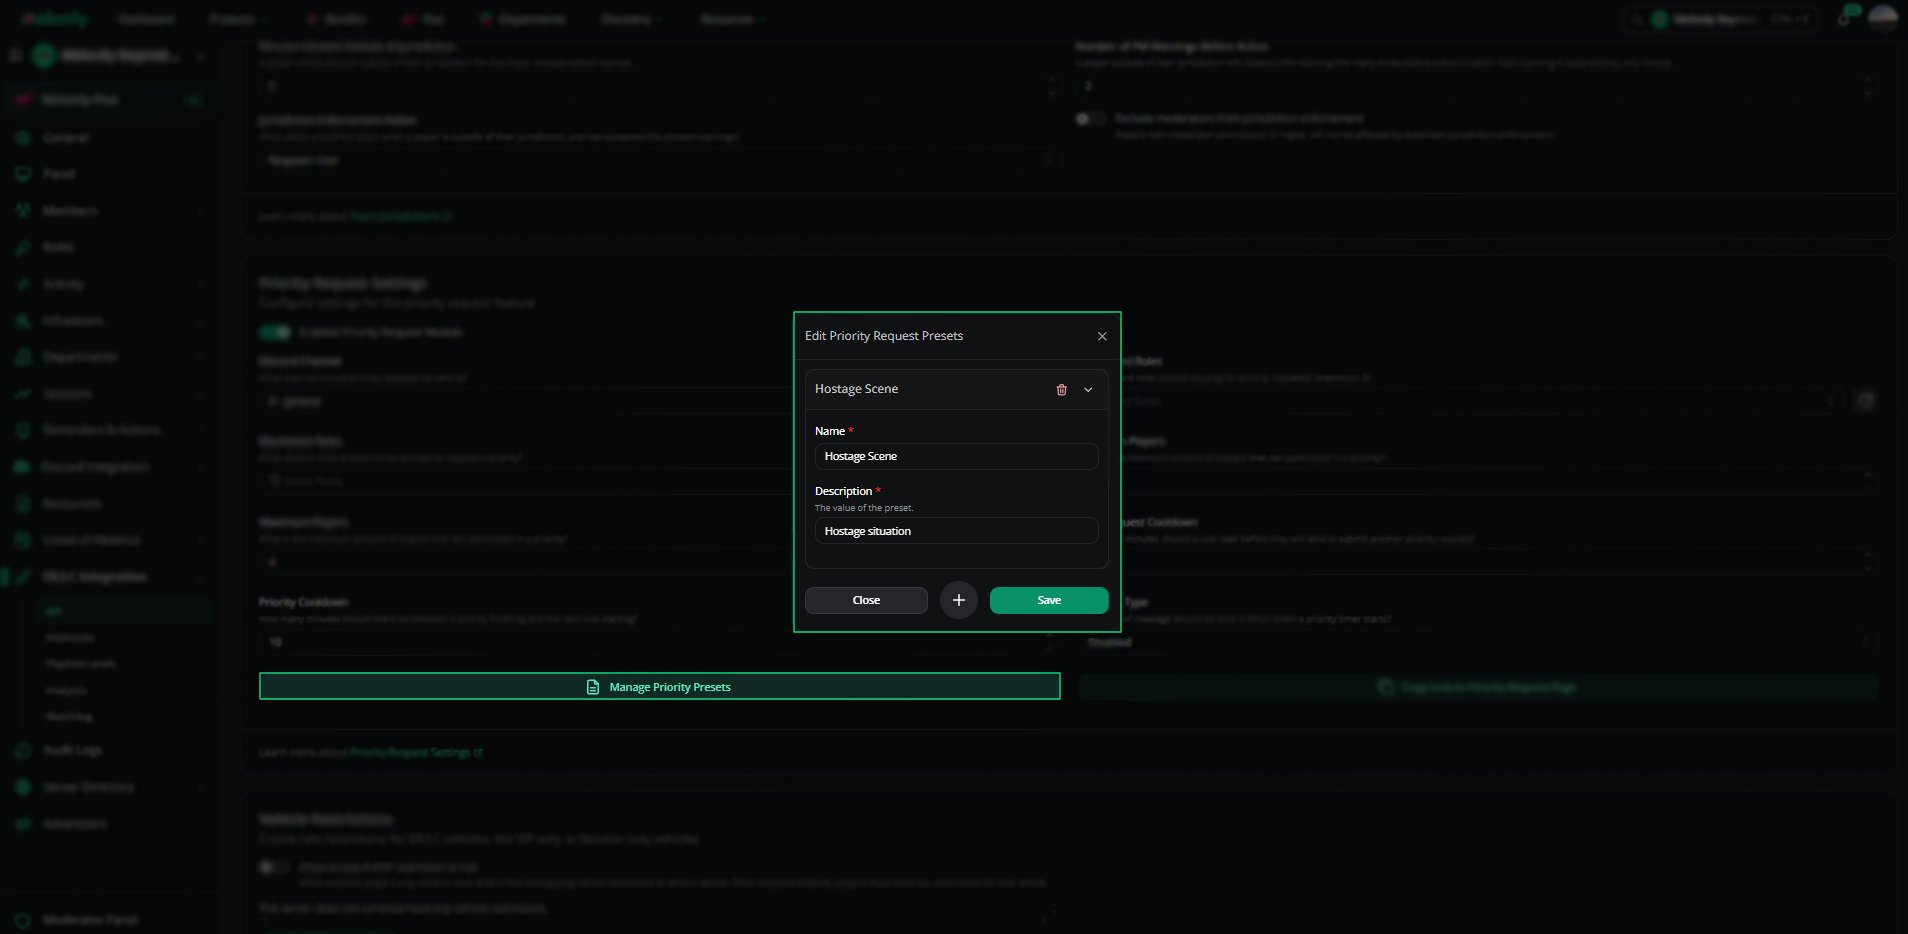
Priority Presets
Managing Priority Requests
The Priority Requests panel allows staff to review, approve, and manage all incoming scene requests.This panel can be accessed from Moderator Panel → Toolbox → Priority Requests.
1
Pending Requests
View all requests that are waiting for staff approval.
Each request includes the player name, preset, description, and submission time.
Staff can approve or deny requests directly from this tab.
Each request includes the player name, preset, description, and submission time.
Staff can approve or deny requests directly from this tab.
2
Queued Requests
View requests that have been approved but are waiting for the cooldown or current scene to finish.
3
Historical Requests
Review previously approved or denied requests.
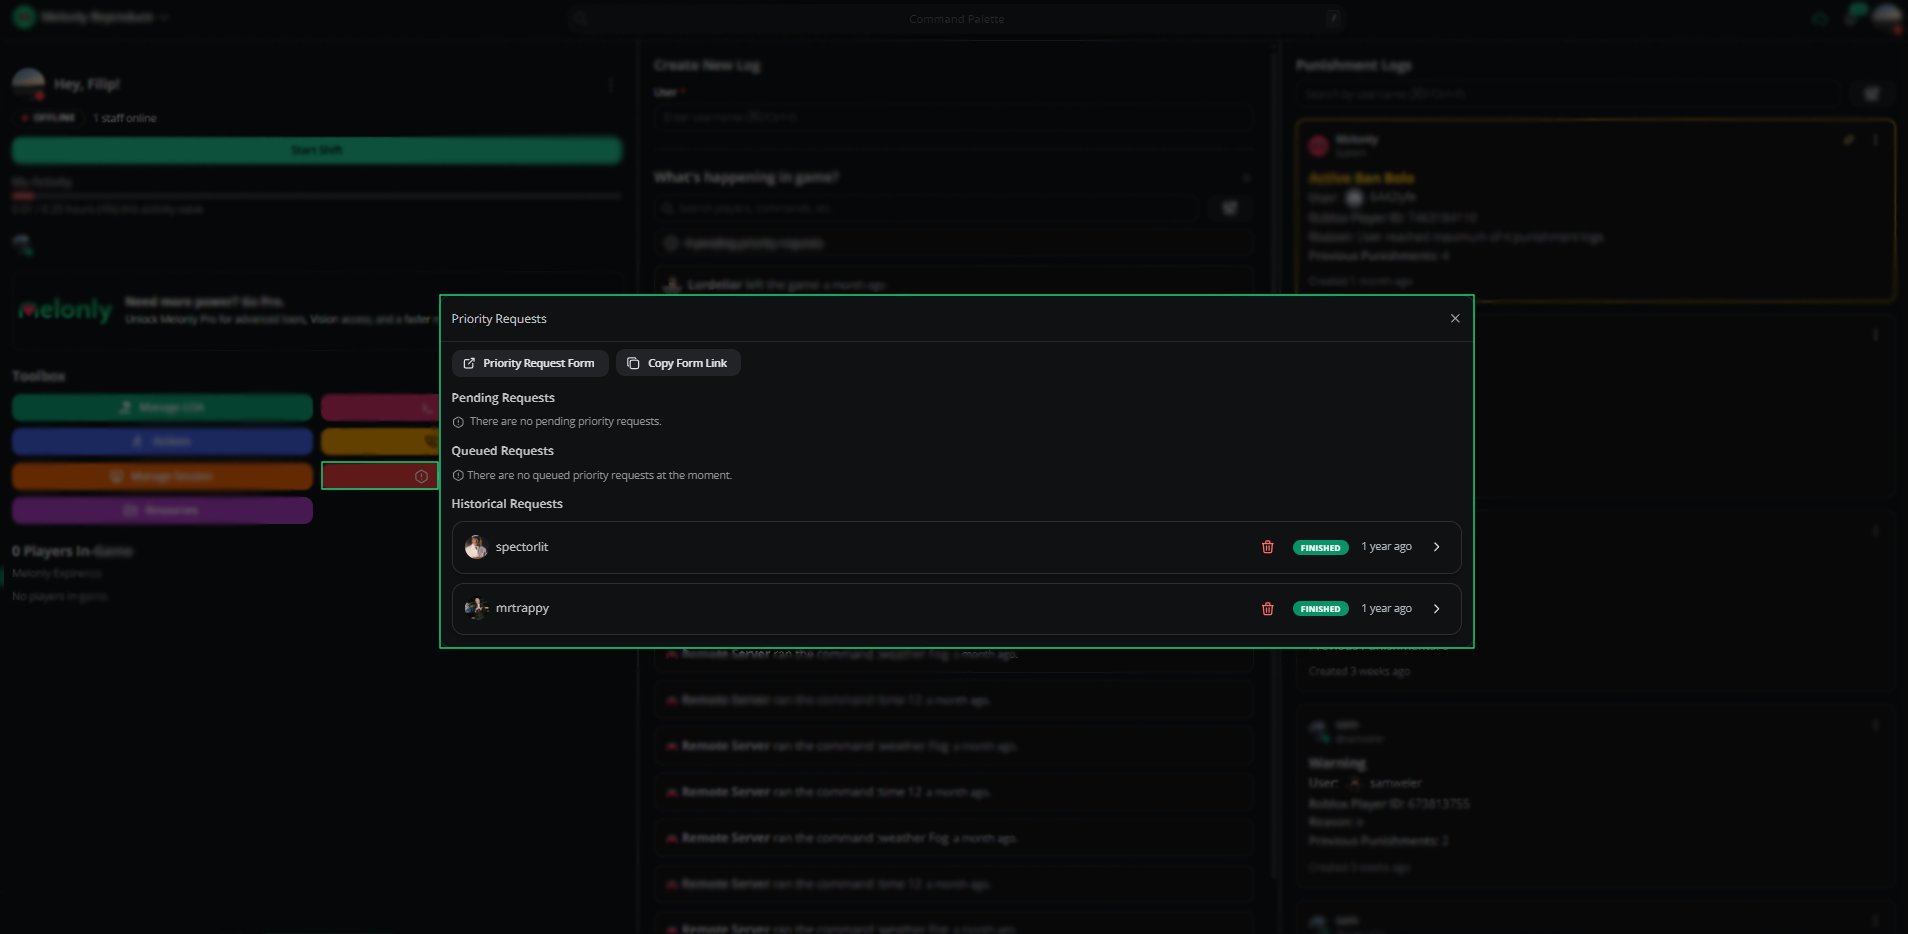
Priority Requests Panel
Example Use Cases
- Allow players to request scenes such as robberies or hostage situations
- Prevent scene stacking by enforcing cooldowns
- Restrict priority requests to approved roles
- Maintain a clear approval trail for all priority scenes
Need help?
Still have questions? Join our Discord server for support from the Melonly Team.