☀️ V5.7: New quality-of-life update for Melonly CAD: call merging, tone stacking, address shortcuts, and more! Learn more: https://melonly.xyz/changelog/V5.7
Use this file to discover all available pages before exploring further.
Melonly provides a wide range of settings and configuration options, allowing you to quickly get your server up and running. Customize it to fit your exact preferences and optimize it for your needs.
Ensure you click the Save button when you are finished.
Otherwise, your selections/edits will not be saved.Also only the Server Owner and members with the Administrator permission can edit the server configurations (Or with Melonly plus the Settings configuration permission).
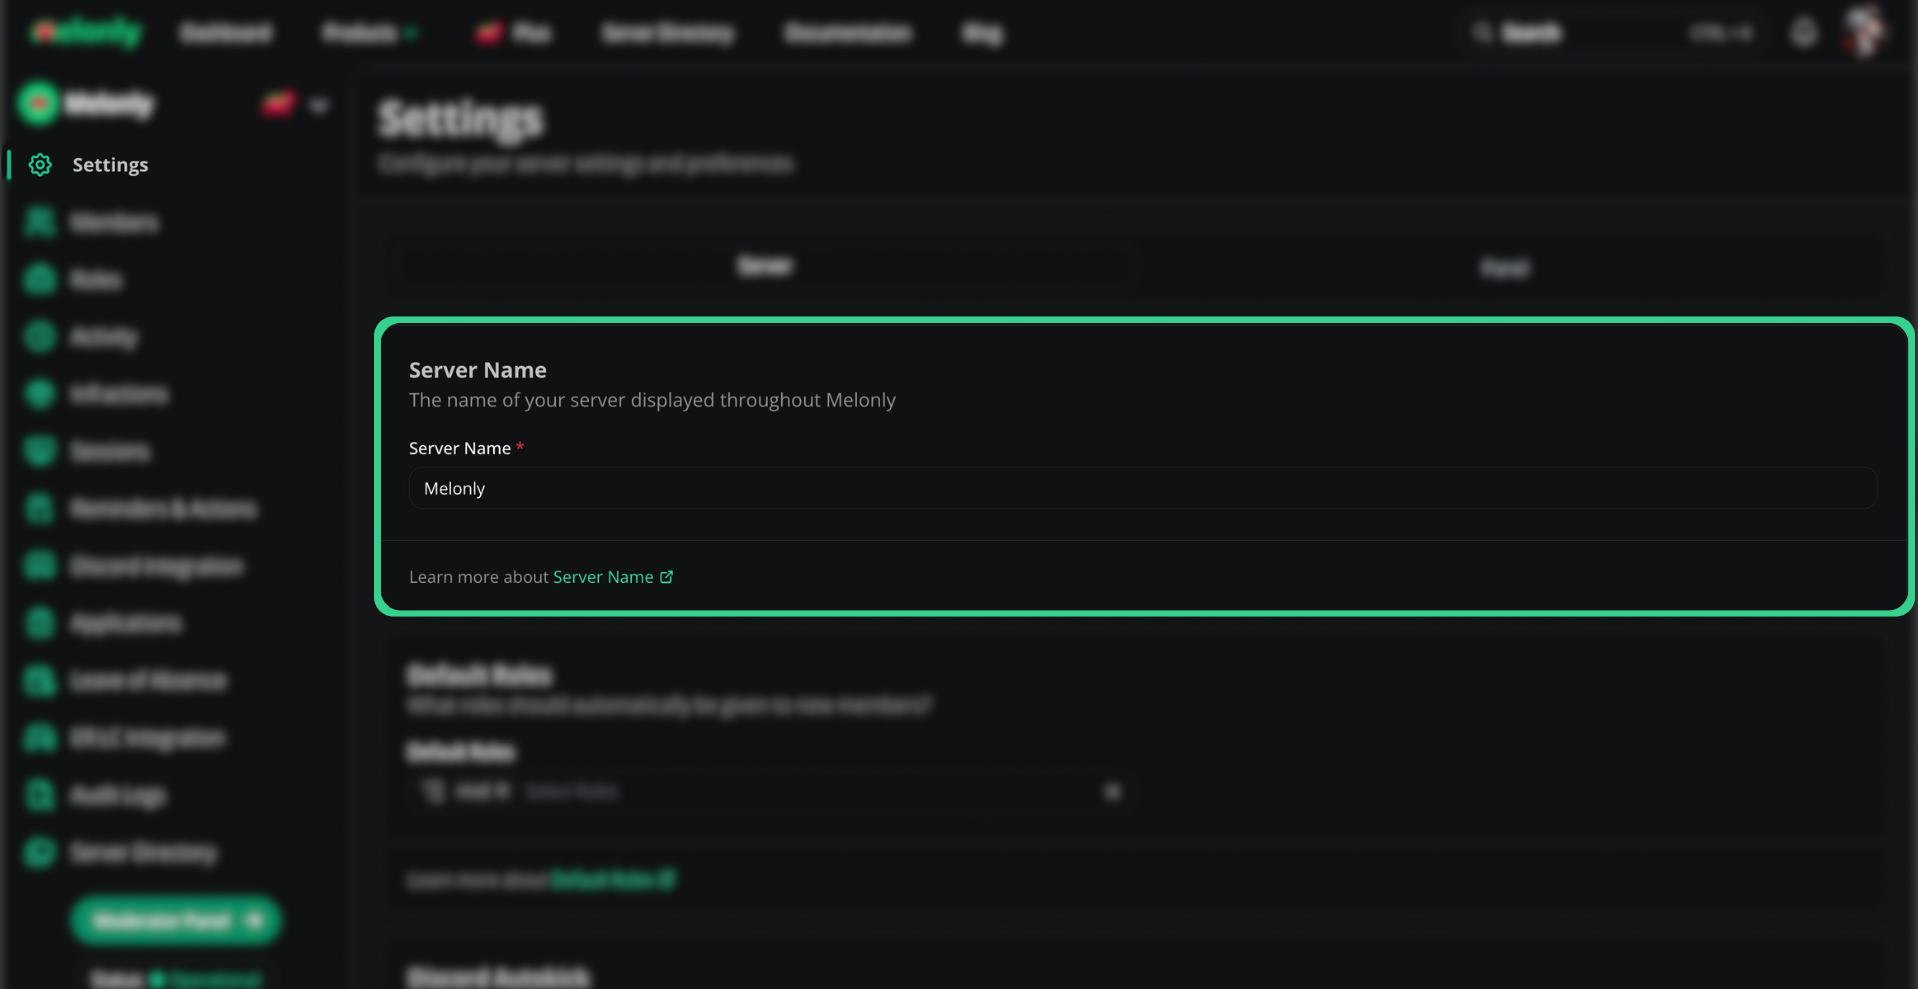
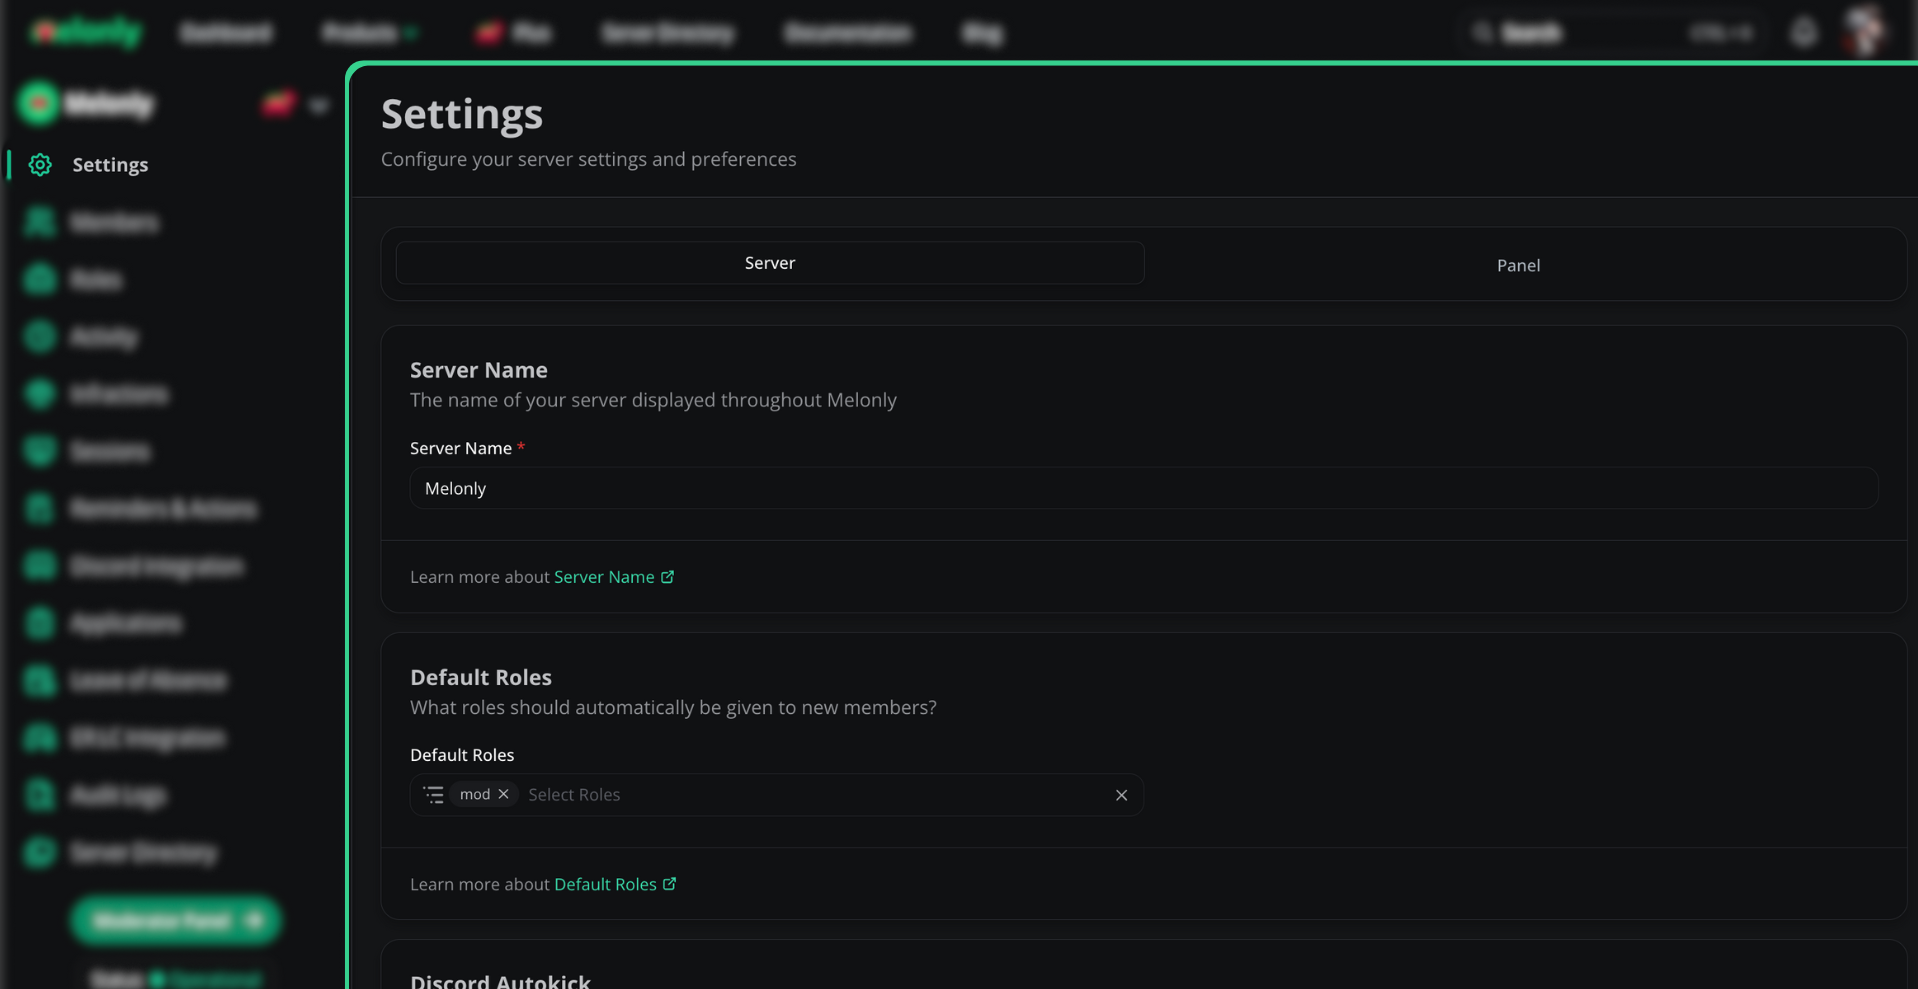
You can easily change the name of your dashboard under the Server Name field. The name change is still subject to previously mentioned rules/guidelines.
- Steps on Configuring your Server Name
Navigating to the Server Settings Page
First to find the server name section, navigate to your servers dashboard page and find the server name section on the page.
Configuring your Servers Name
Once you’ve found the server name section you can customise your server name to what you want.
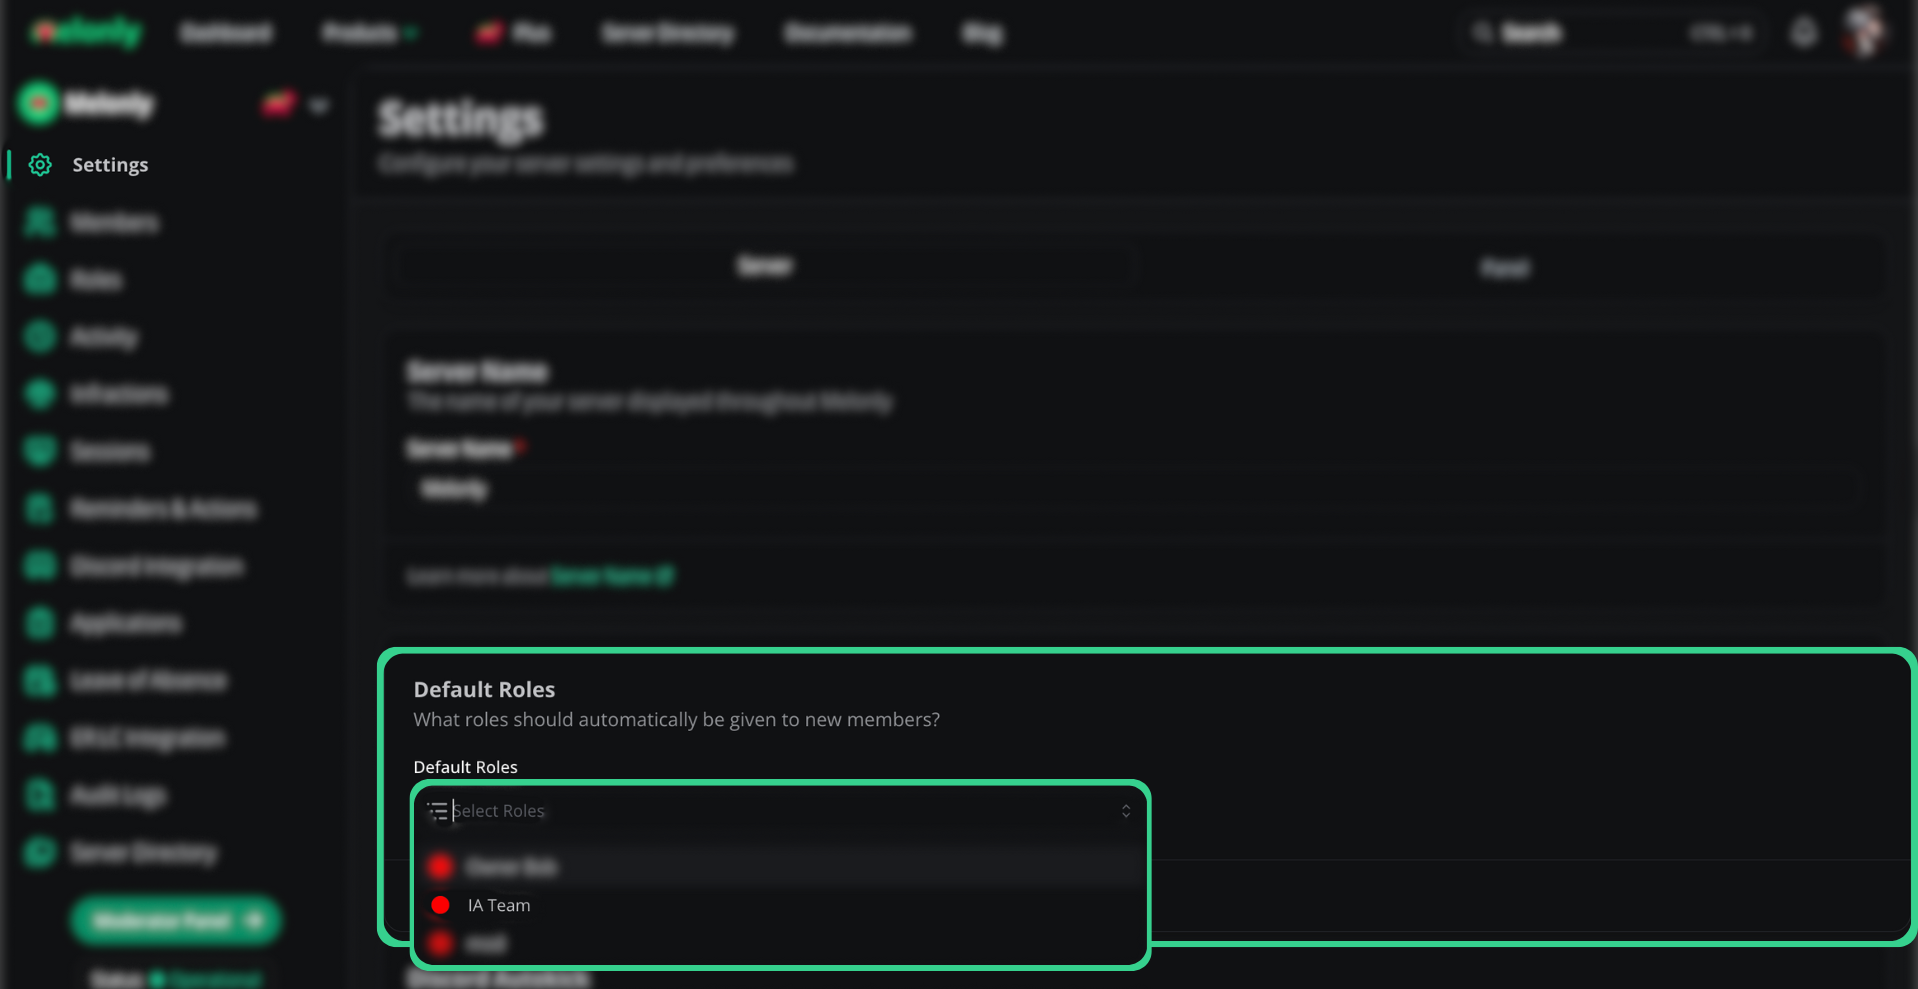
Setting a default role automatically gives a melonly role, set by yourself, to a user. This allows you to swiftly give certain permissions to new staff members and quicken your servers workflow!
- Steps on Configuring your Default Roles
Navigating to the Server Settings Page
First to find default roles, navigate to your servers dashboard page and find the default roles section on the page.
Configuring your Default Roles
Once you’ve found the default roles section you can customise your default roles to your needs. You can have as many default roles as you need - you can also choose none. It’s all up to you.
You’ll enable this if you want members of this server be kicked when they leave the linked Discord server.
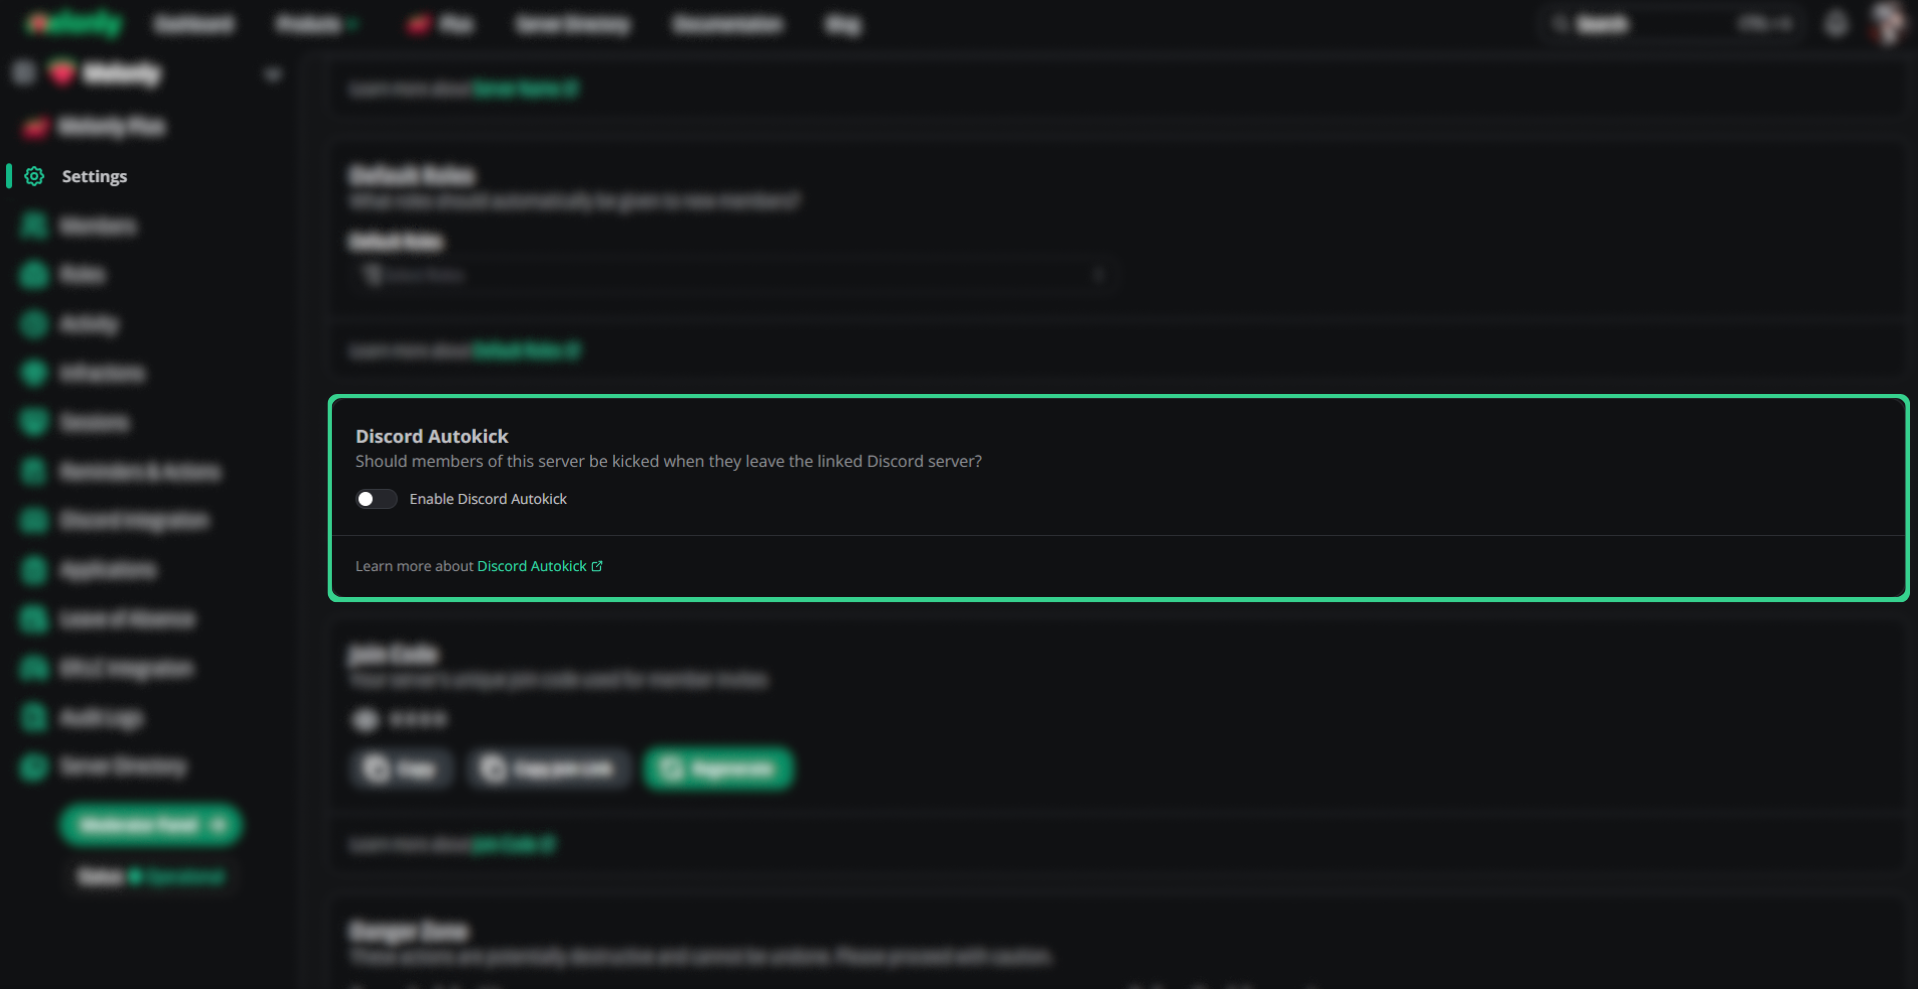
- Steps on Configuring Discord Autokick
Navigating to the Server Settings Page
First to find Discord Autokick, navigate to your servers dashboard page and find the Discord Autokick section on the page.
Enabling/Disabling Discord Autokick
Once you’ve found the Discord Autokick section you can enable/disable the autokick feature. This will automatically kick members from your server when they leave the linked Discord server.
With Melonly you can automatically remove members who have no roles assigned to them from the server. This is useful for keeping your server clean and tidy, as well as preventing any potential issues/threats with members who have no roles or are no longer on your team.
- Steps on Configuring Remove Members with No Roles
Navigating to the Server Settings Page
First to find Remove Members with No Roles, navigate to your servers dashboard page and find the Remove Members with No Roles section on the server settings page.
Enabling/Disabling Remove Members with No Roles
Once you’ve found the Remove Members with No Roles section you can enable/disable the feature. This will automatically remove members from your server when they have no roles assigned to them.
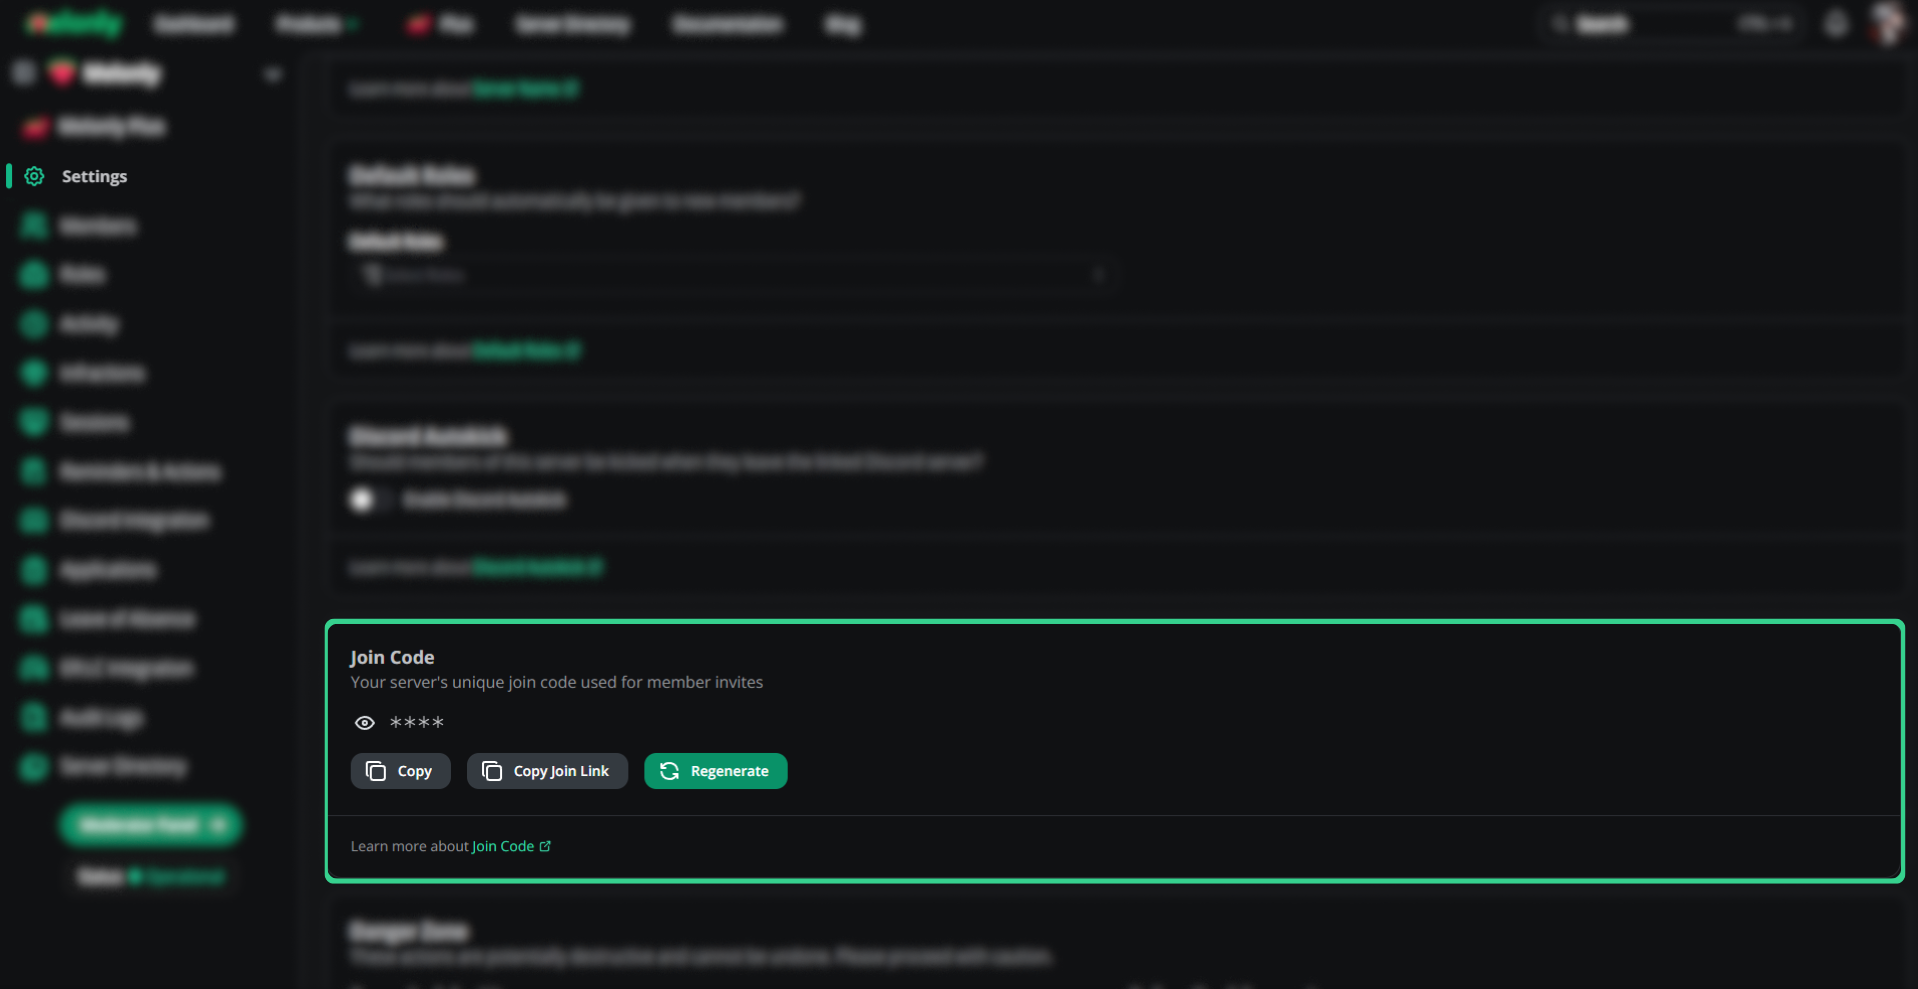
This code is used to invite new staff members to your dashboard. You can also invite them with a link. Click Copy Join Link to copy your server’s join link to your clipboard. This can’t be disabled, only regenerated.Need a new code? No Worries.Click the Regenerate button to regenerate a new join code for your server. This will also invalidate the previous join code, and it will no longer work.
- Steps on Configuring your Join Code
Navigating to the Server Settings Page
To find the join code section, navigate to your servers dashboard page and find the join code section.
Learning about your Join Code
From here you can copy your join code, regenerate it, and learn more about it. Your join code is used to invite new staff members to your dashboard. You can also invite them with a link. Click Copy Join Link to copy your server’s join link to your clipboard.
Your Join Code is unique to your server, so make sure you keep it safe and only share it with trusted members.
Here you can explore all the open beta tests Melonly offers, giving you a sneak peek at upcoming features. Feel free to try them out and enable or disable them whenever you like!Current Beta Features:
There are currently no public beta features, come back later!
On the Dashboard Setting you have a Danger Zone, be careful with what action you perform in this danger zone because once you’ve completed the action you can’t turn back.
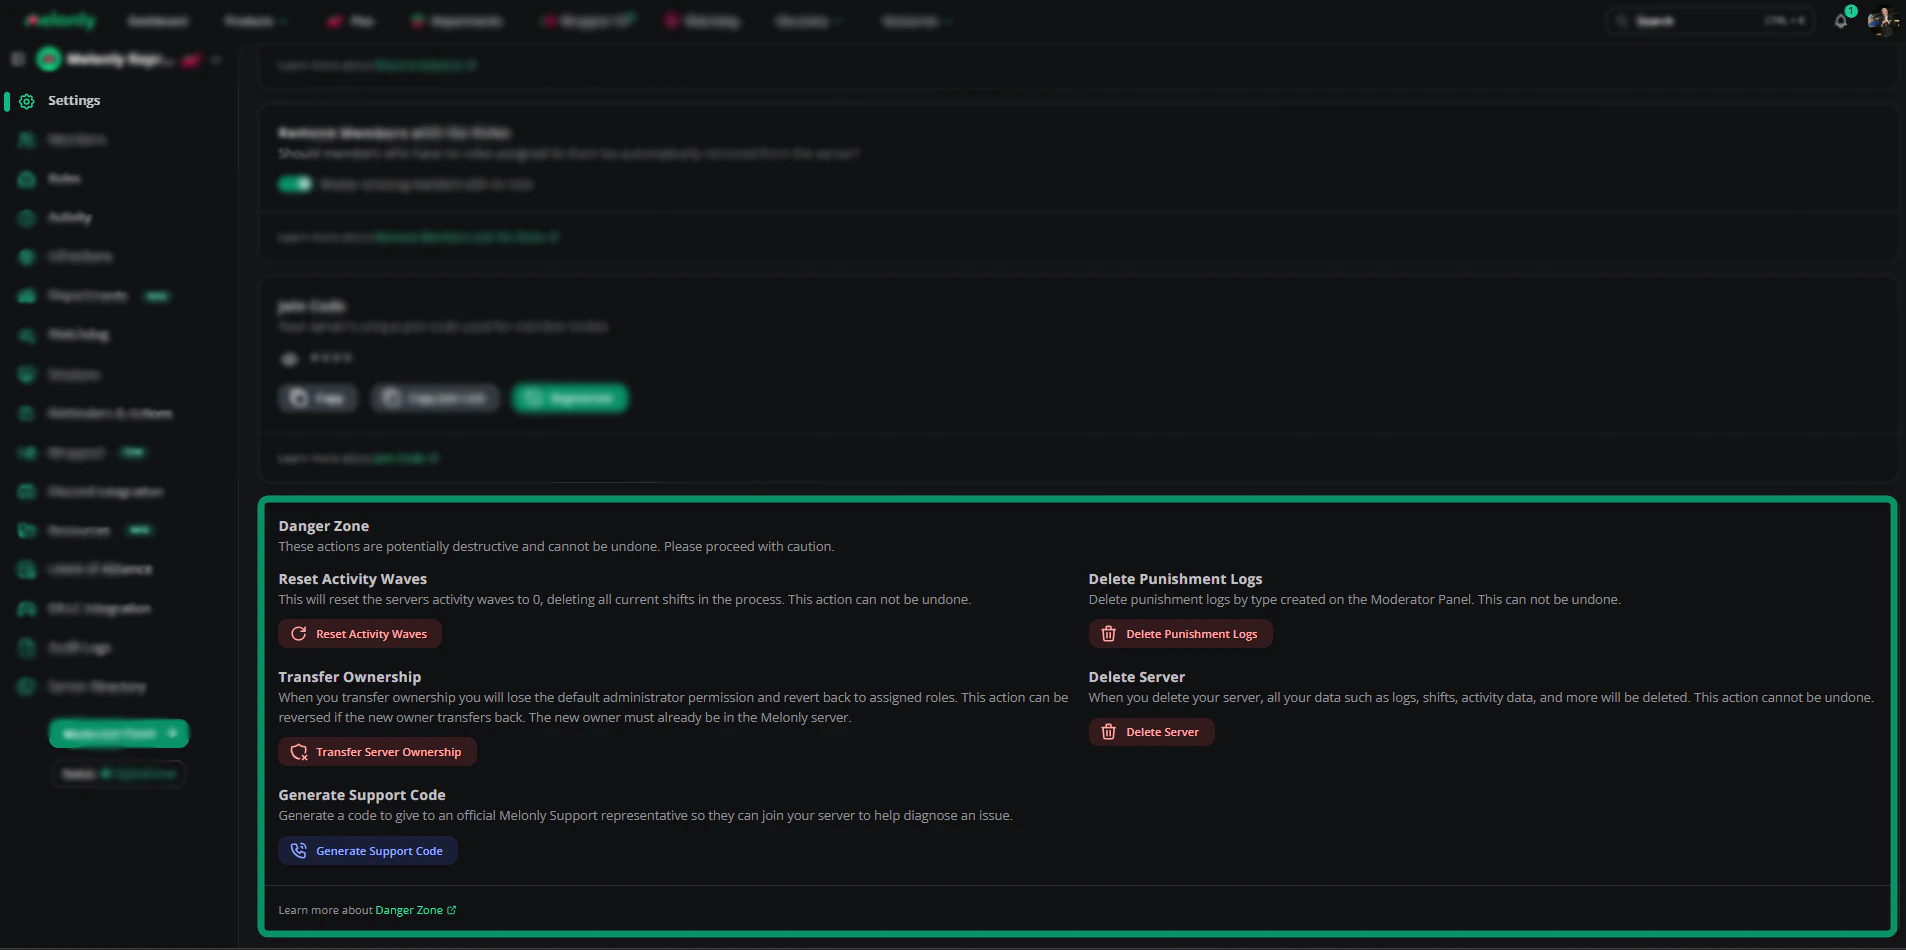
Inside the danger zone you have 4 main options, Reset Activity Waves, Delete Punishment Logs, Transfer Ownership, and Delete Server.
Resetting Activity Waves, This will reset the servers’ activity waves to 0, deleting all current shifts in the process. This action can not be undone.
Deleting Punishment Logs, Delete punishment logs by type created (or all) on the Moderator Panel. This can not be undone.
Transferring Ownership, When you transfer ownership you will lose the default administrator permission and revert back to assigned roles. This action can be reversed if the new owner transfers back. The new owner must already be in the Melonly server.
Delete Server, When you delete your server, all your data such as logs, shifts, activity data, and more will be deleted. This action cannot be undone.
Generate Support Code, This will generate a support code that you can provide to Melonly support staff when you need assistance. This code helps them identify your server and its settings quickly.
- Steps on the Danger Zone within your Melonly Dashboard
Navigating to the Server Settings Page
Navigating to the Server Settings Page, you can find the Danger Zone section at the bottom of the page.
Danger Zone Section - Actions
From here you can see the Danger Zone section, which contains all the actions you can perform. All actions cannot be undone, so be careful with what actions you perform.
Deleting your Dashboard cannot be undone. All data including punishments, shifts,
applications, LOAs, etc will be lost and cannot be recovered. Ensure you want to do this.
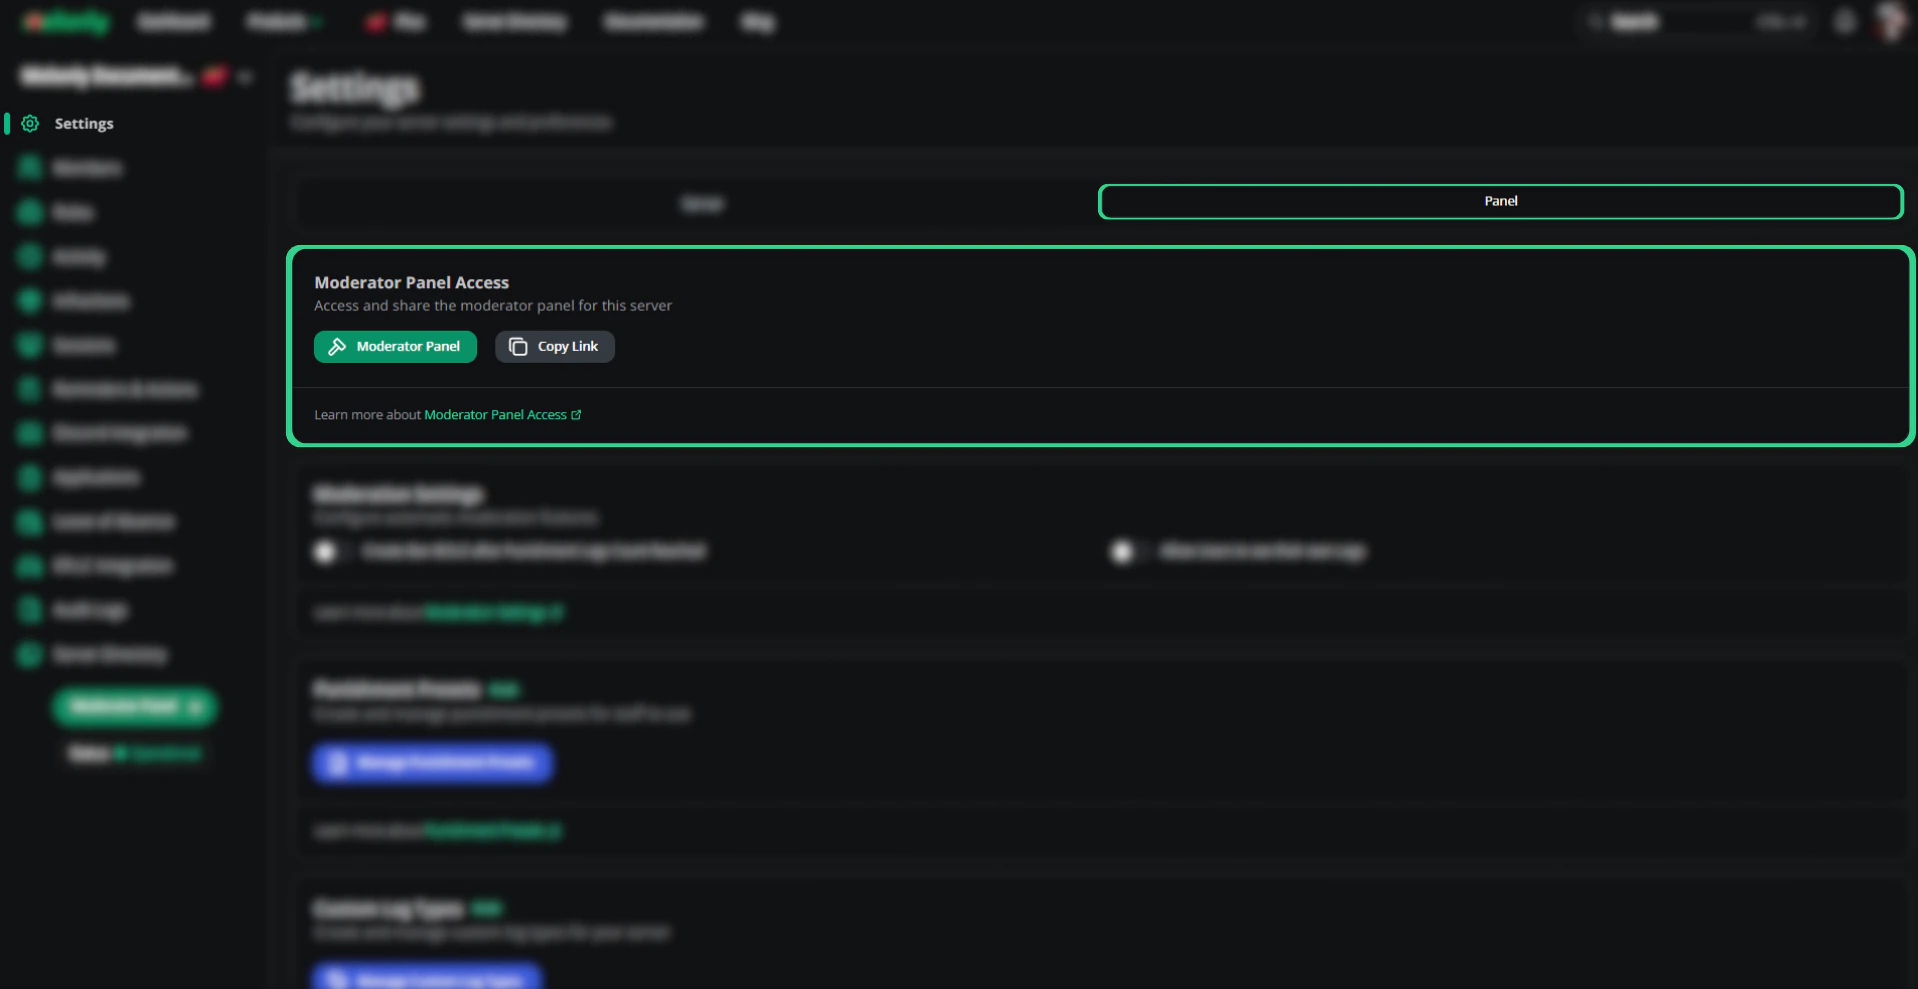
From here you can access and share the moderator panel for this server with a quick link.
- Steps on sharing your servers moderator panel link
Navigating to the Server Settings Page
First to find the moderator panel link, navigate to your servers Settings Dashboard Page and go to the Panel tab and find the moderator panel section on the page.
Copying your Moderator Panel Link
Once you’ve found the moderator panel section you can copy your moderator panel link to share with your staff members. This link will allow them to access the moderator panel for this server only if they’ve joined via the join code or have been given access by discord linked roles.
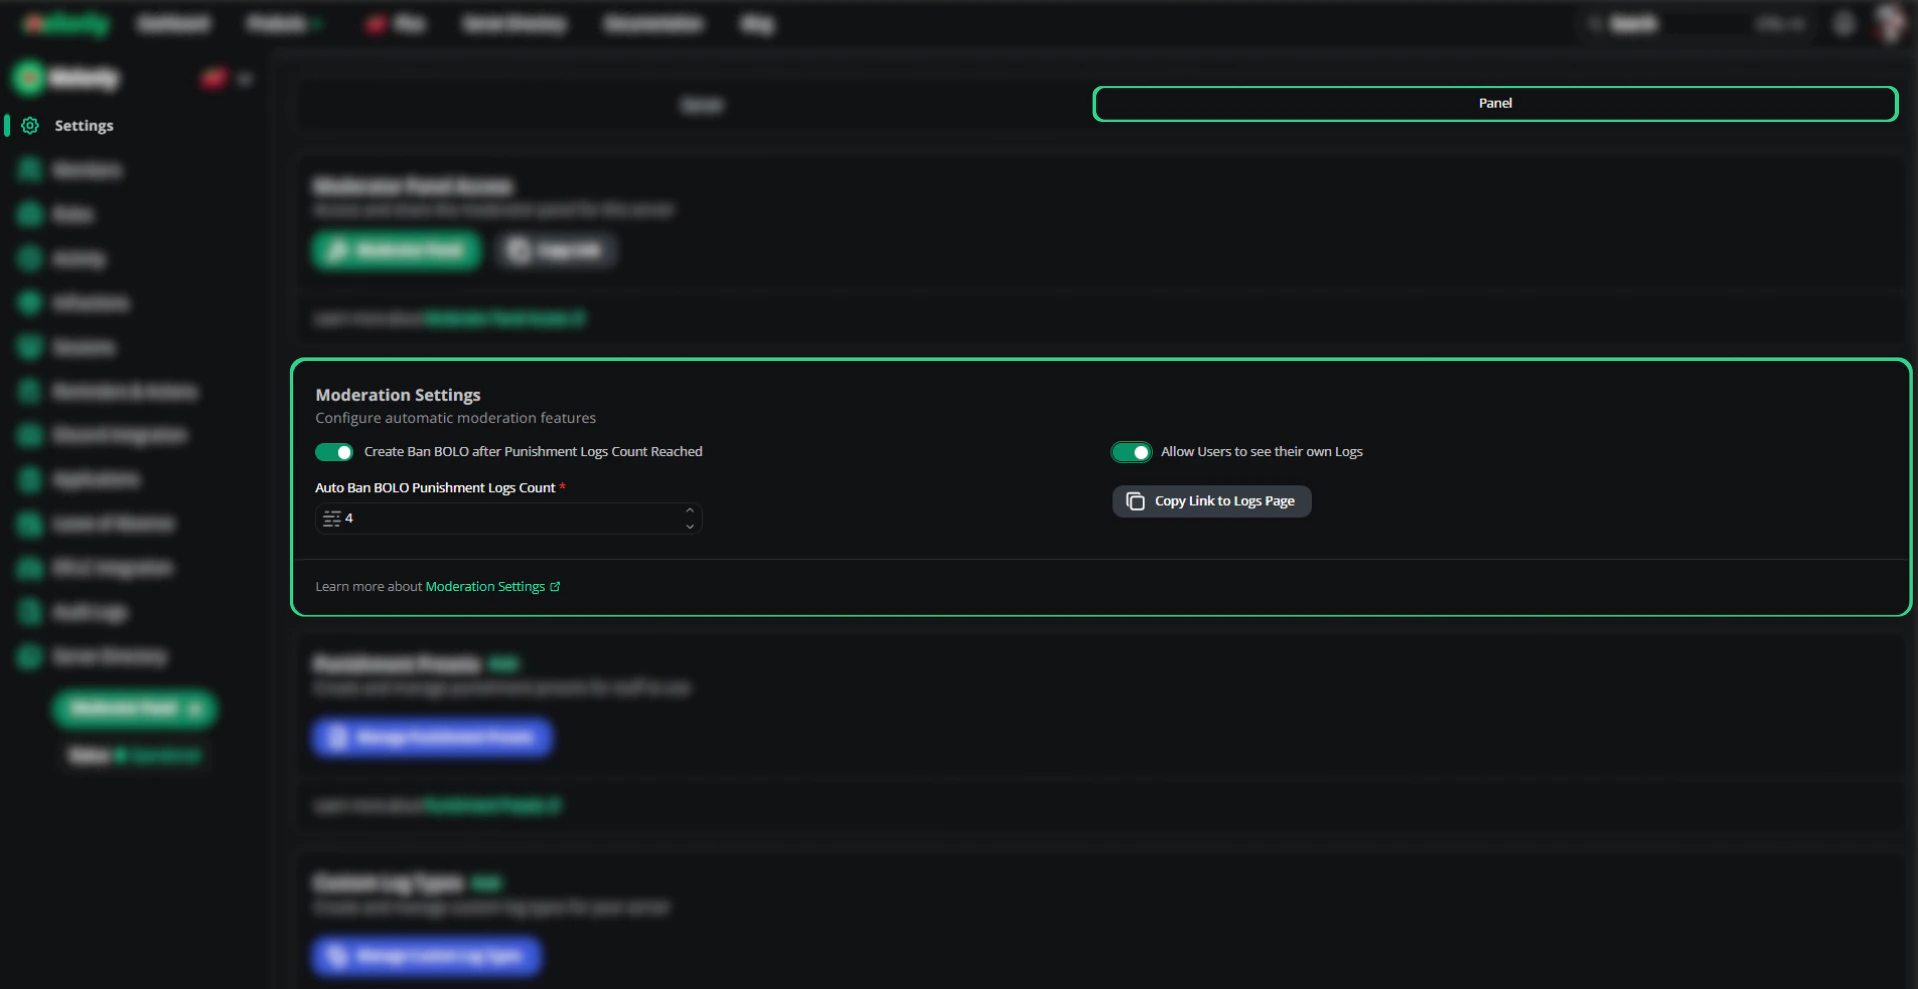
This feature is to create a automatic ban bolo once a certain amount of Melonly logs have been reached.
- Steps on Configuring Automatic Ban Bolos
Navigating to the Server Settings Page
First to find the automatic ban bolos section, navigate to your servers Settings Dashboard Page and go to the Panel tab and find the moderator panel section on the page.
Configuring Automatic Ban Bolos
Once you’ve found the automatic ban bolos section you can enable/disable the automatic ban bolos feature. You can also configure the amount of logs before Melonly creates a automatic ban bolo for the user (e.g. if a user reachs 6 logs, Melonly will create a Ban Bolo for them automatically).
With this option enabled, players on your server will be able to see their punishment logs issued to them.If this option is disabled, users will not be able to see their logs for your server.
- Steps on allowing users to see their own logs
Navigating to the Server Settings Page
First to find the allow users to see their own logs section, navigate to your servers Settings Dashboard Page and go to the Panel tab and find the moderator settings section on the page.
Toggling Allow Users to see their own Logs
Once you’ve found the allow users to see their own logs section you can enable/disable the allow users to see their own logs feature. This will allow users to see their own logs issued to them, you can also copy the link to the user logs page to share with your users.
Furthermore, if a log is hidden, the user will not be able to see it regardless. Learn more about this here.
This is a Melonly Plus feature, find out more here.
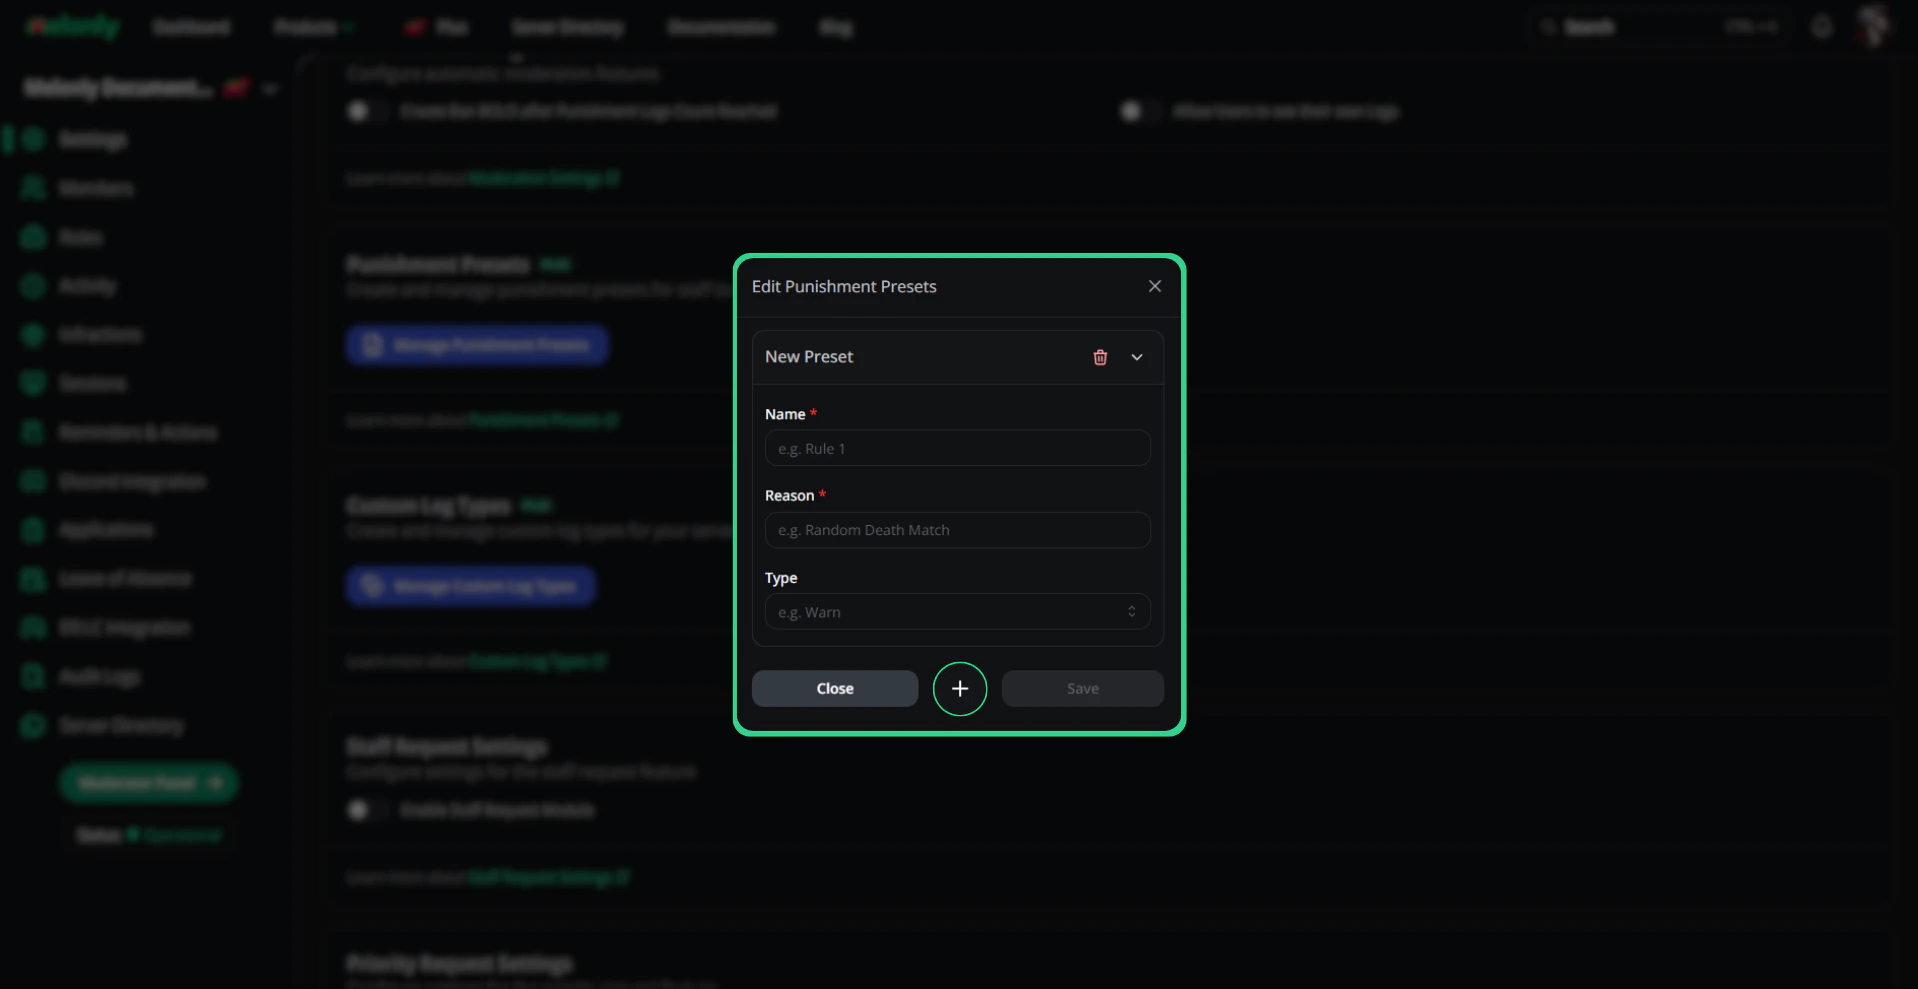
Punishment presets are a way to quickly apply a set of rules/punishments to a member. This is useful for when you have a set of rules that you want to apply to a member, such as a warning or a ban.You can have as many presets as you are wanting, this is for easy access for your staff to quickly select the rule/punishment to easily moderate the member.
- Steps on Configuring your Punishment Presets
Navigating to the Server Settings Page
Firstly to find the punishment presets section, navigate to your servers Settings Dashboard Page and go to the Panel tab and find the punishment presets section on the page.
Configuring your Punishment Presets
Once you’ve found the punishment presets section you can configure your punishment presets to your needs. You can add as many presets as you want, and you can also edit them at any time. These are typically used for quick access to common punishments, such as relevany server rules.
This is a Melonly Plus feature, find out more here.
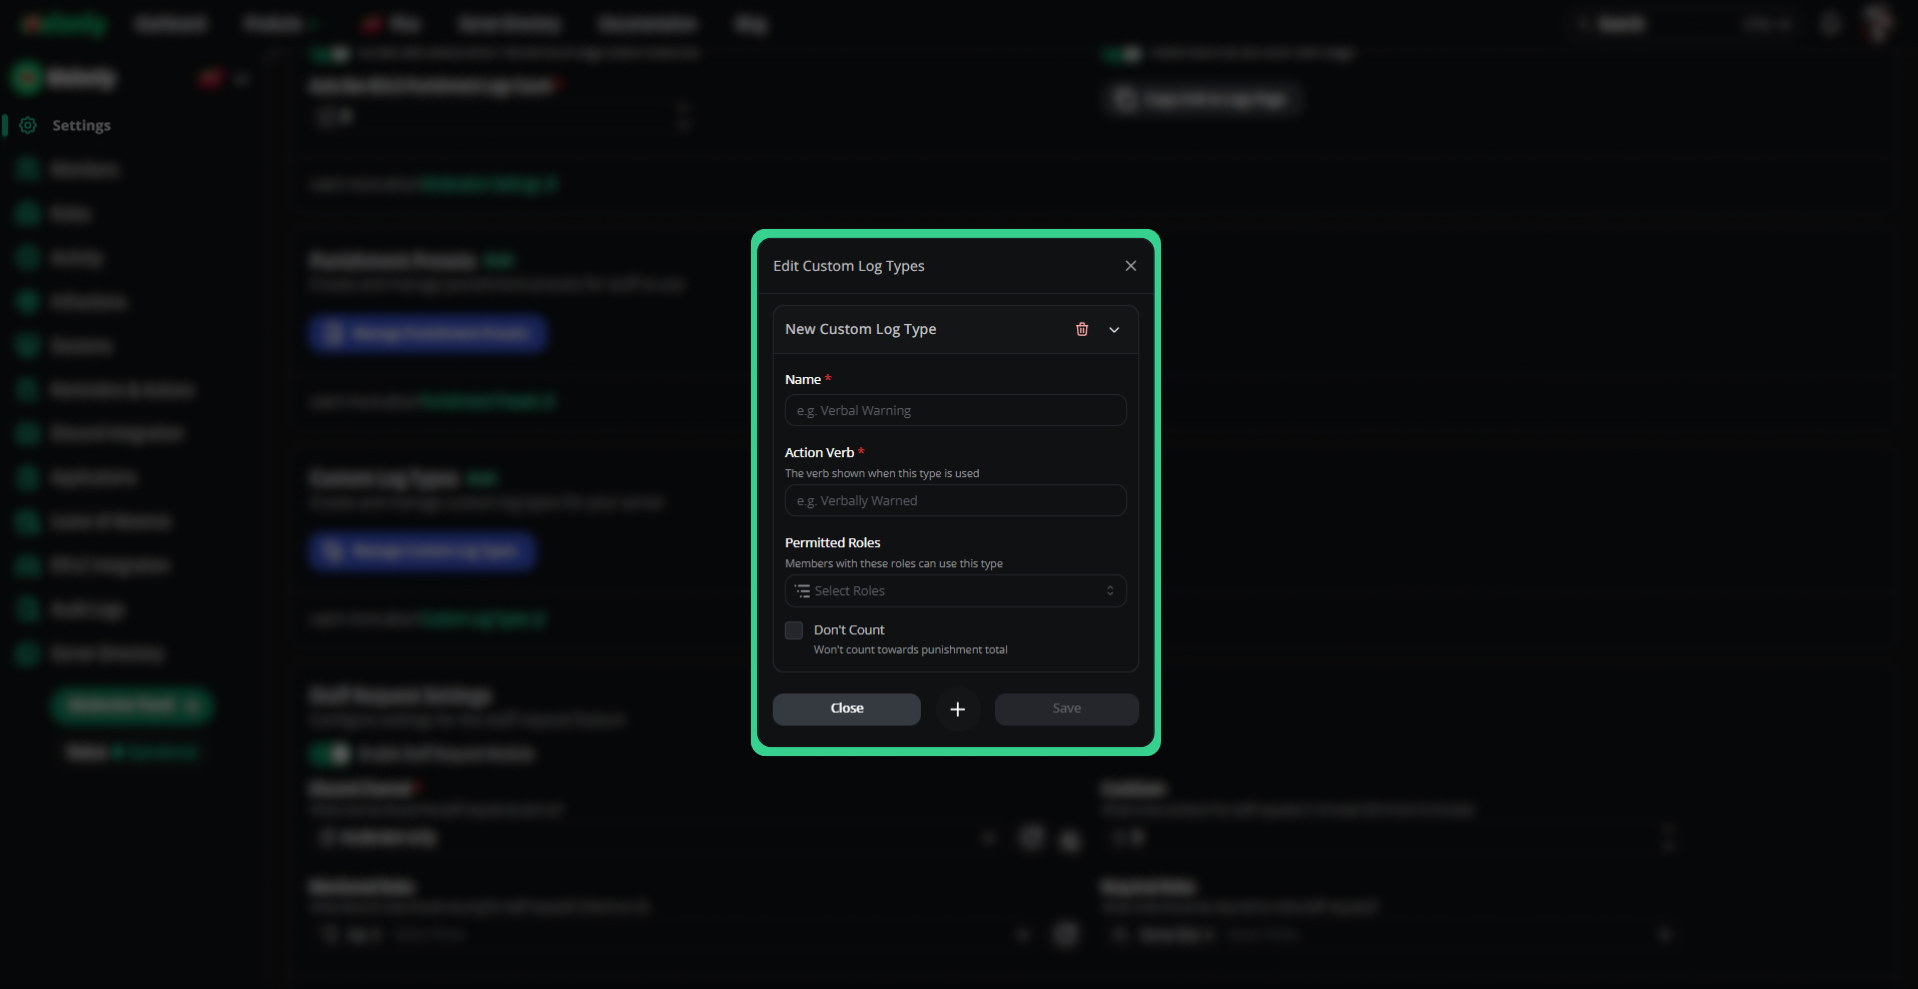
Create custom log types to better tailor punishment logs to your needs.
- Steps on Configuring Custom Log Types
Navigating to the Server Settings Page
Firstly to find the custom log types section, navigate to your servers Settings Dashboard Page and go to the Panel tab and find the custom log types section on the page.
Configuring your Custom Log Types
Once you’ve found the custom log types section you can configure your custom log types to your needs. You can add as many custom log types as you want, and you can also edit them at any time.These are typically used for more specific punishments that are not covered by the default log types (e.g. Verbal Warnings).
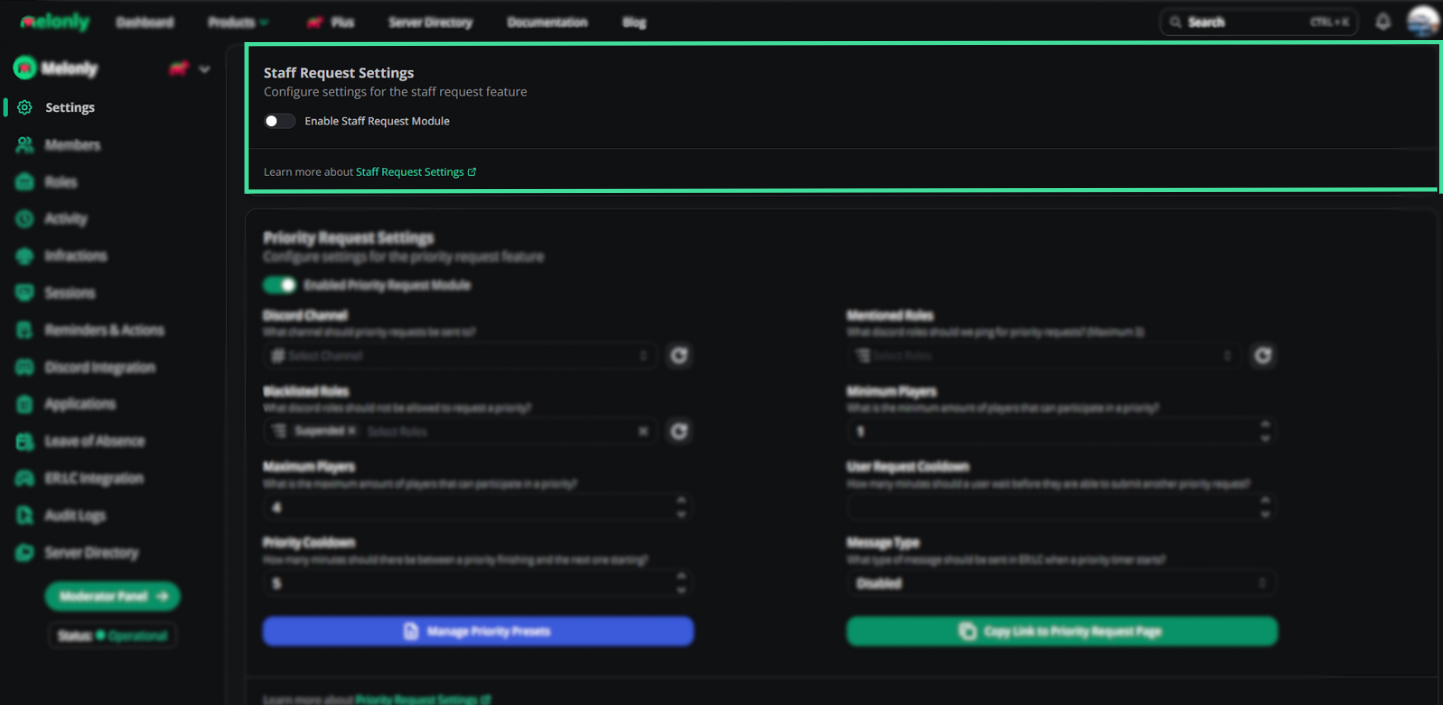
With this enabled, staff members will be able to request staff through a button on the dashboard notifying a discord channel.When this feature is turned on, you can edit the discord channel configuration to see where the staff request gets sent and what role it would mention. By adding a Required Role you’ll be able to hit the staff request button so only specific members click the button.If you add a cooldown, it prevents staff members spamming the staff request button, it has a minimum cooldown of 5 minutes.
In-Game PM Settings
You are able to configure the in-game PM settings for staff requests here. You can choose to enable or disable in-game PMs, as well as customize the message that is sent to staff members when a request is made. With this you can also send a custom message.
This feature requires you to setup an API key. You can learn more about that below.
ER:LC API Integration
Integrating Melonly with your ER:LC server
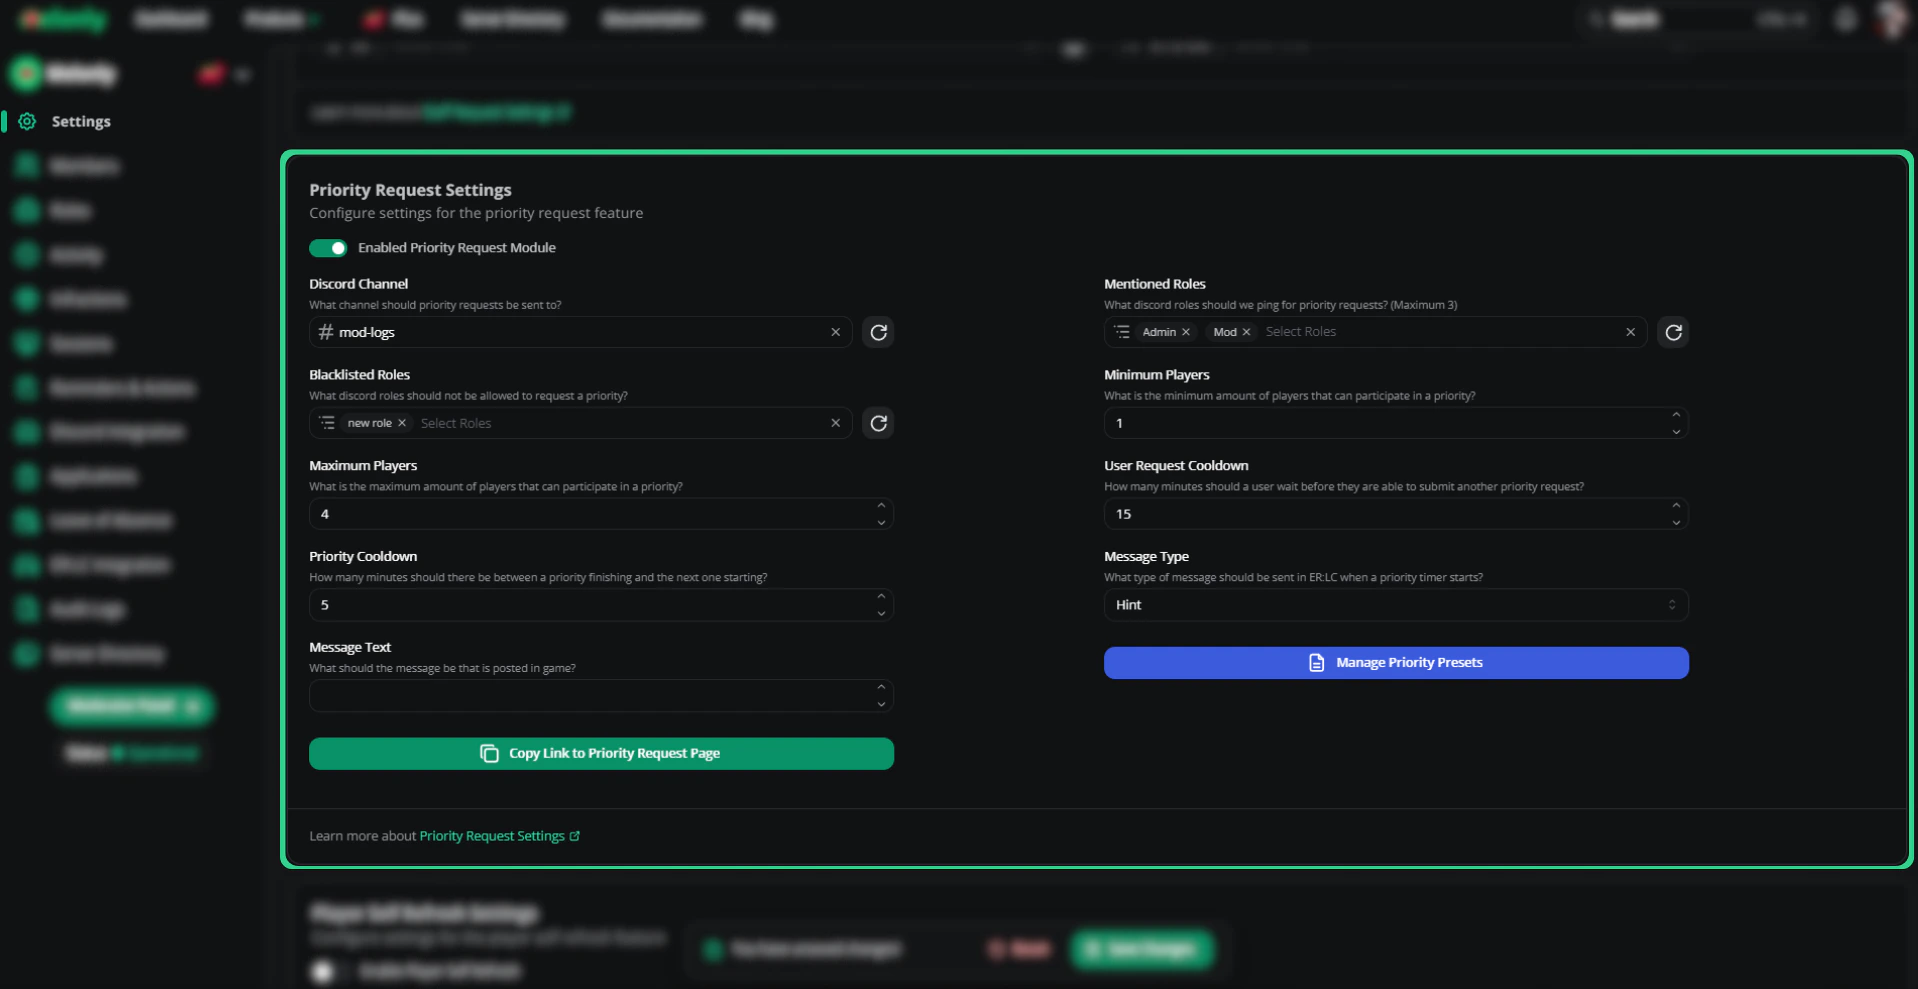
Priority requests allow for your members in the community to request priority roleplay time in your in-game server. This can be used for a variety of reasons, such as a special event, a roleplay that requires a lot of attention, or a roleplay that is time-sensitive.
The minimum and maximum players are the amount of players that are required to be in the server for a priority request to be made. This is to ensure that there are enough players to participate in the roleplay or that too many wont be participating.
User cooldown is the amount of time a user must wait before making another priority request. Priority cooldown is the amount of time between priority requests before the next one is automatically activated.
Blacklisted roles are roles that are not allowed to make priority requests. This is useful for roles that are not allowed to participate in priority roleplays.
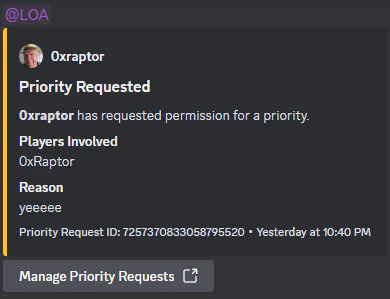
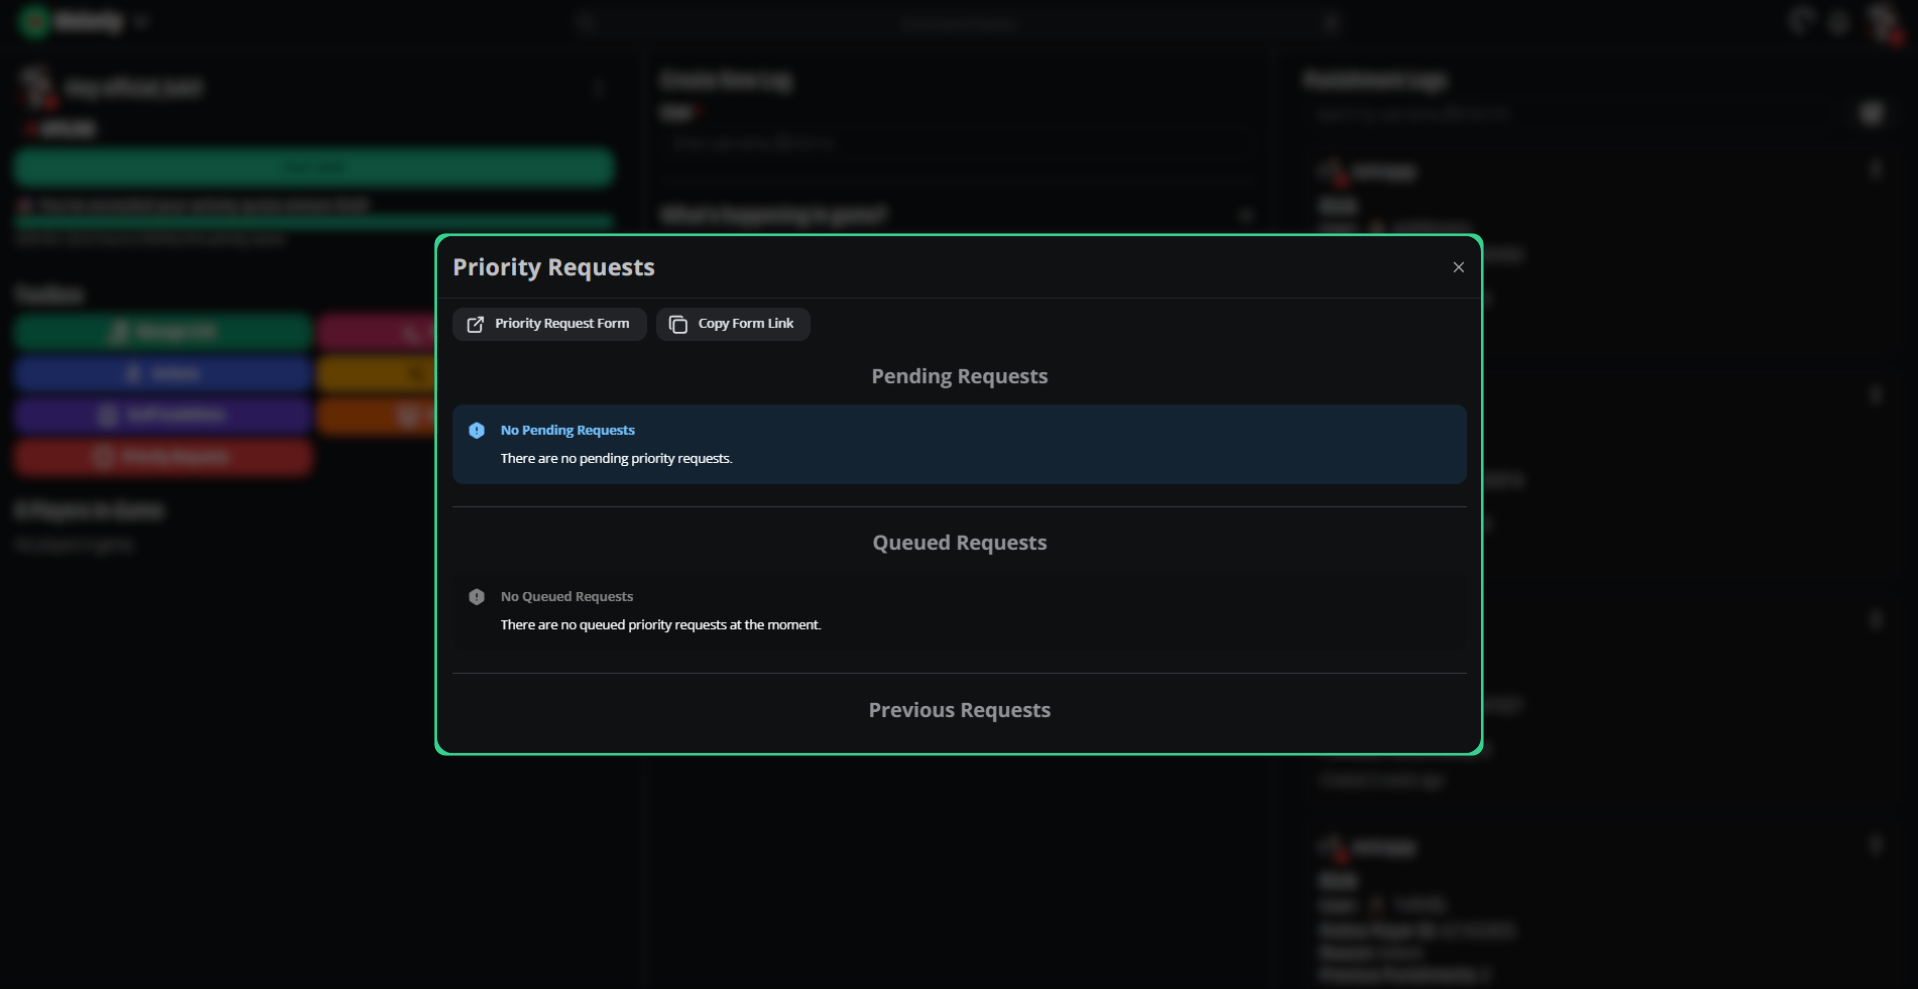
To manage priority requests, you can find them under “Priority Requests”. Here you can see all the requests that have been made, who made them, and when they were made. You can also approve or deny requests from this page. You can also see the current queue for your server.
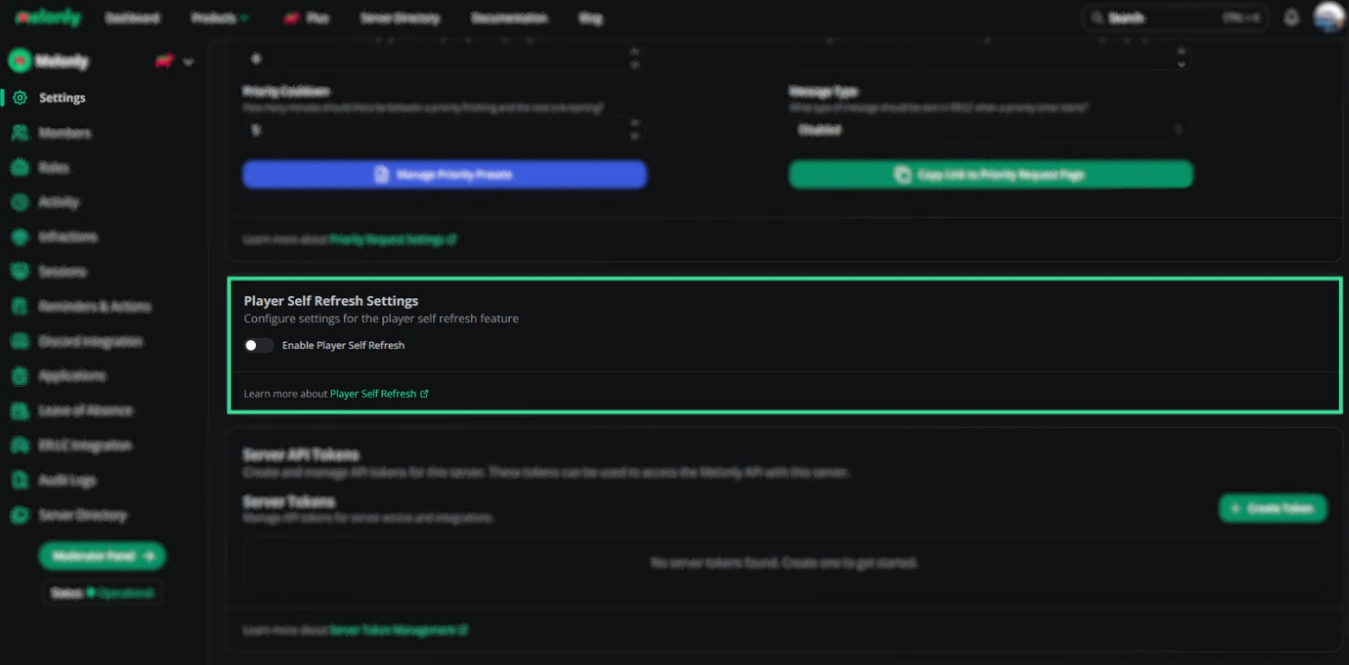
When enabled, players can refresh their characters in-game via the Discord bot.
Melonly Support
Still need help? Join our Discord server and ask for help in the support channel. Our staff team will be happy to assist you with any issues you may have.