
The Log Form
The Create New Log form sits at the top of the middle column. The rest of the form opens once you enter a player.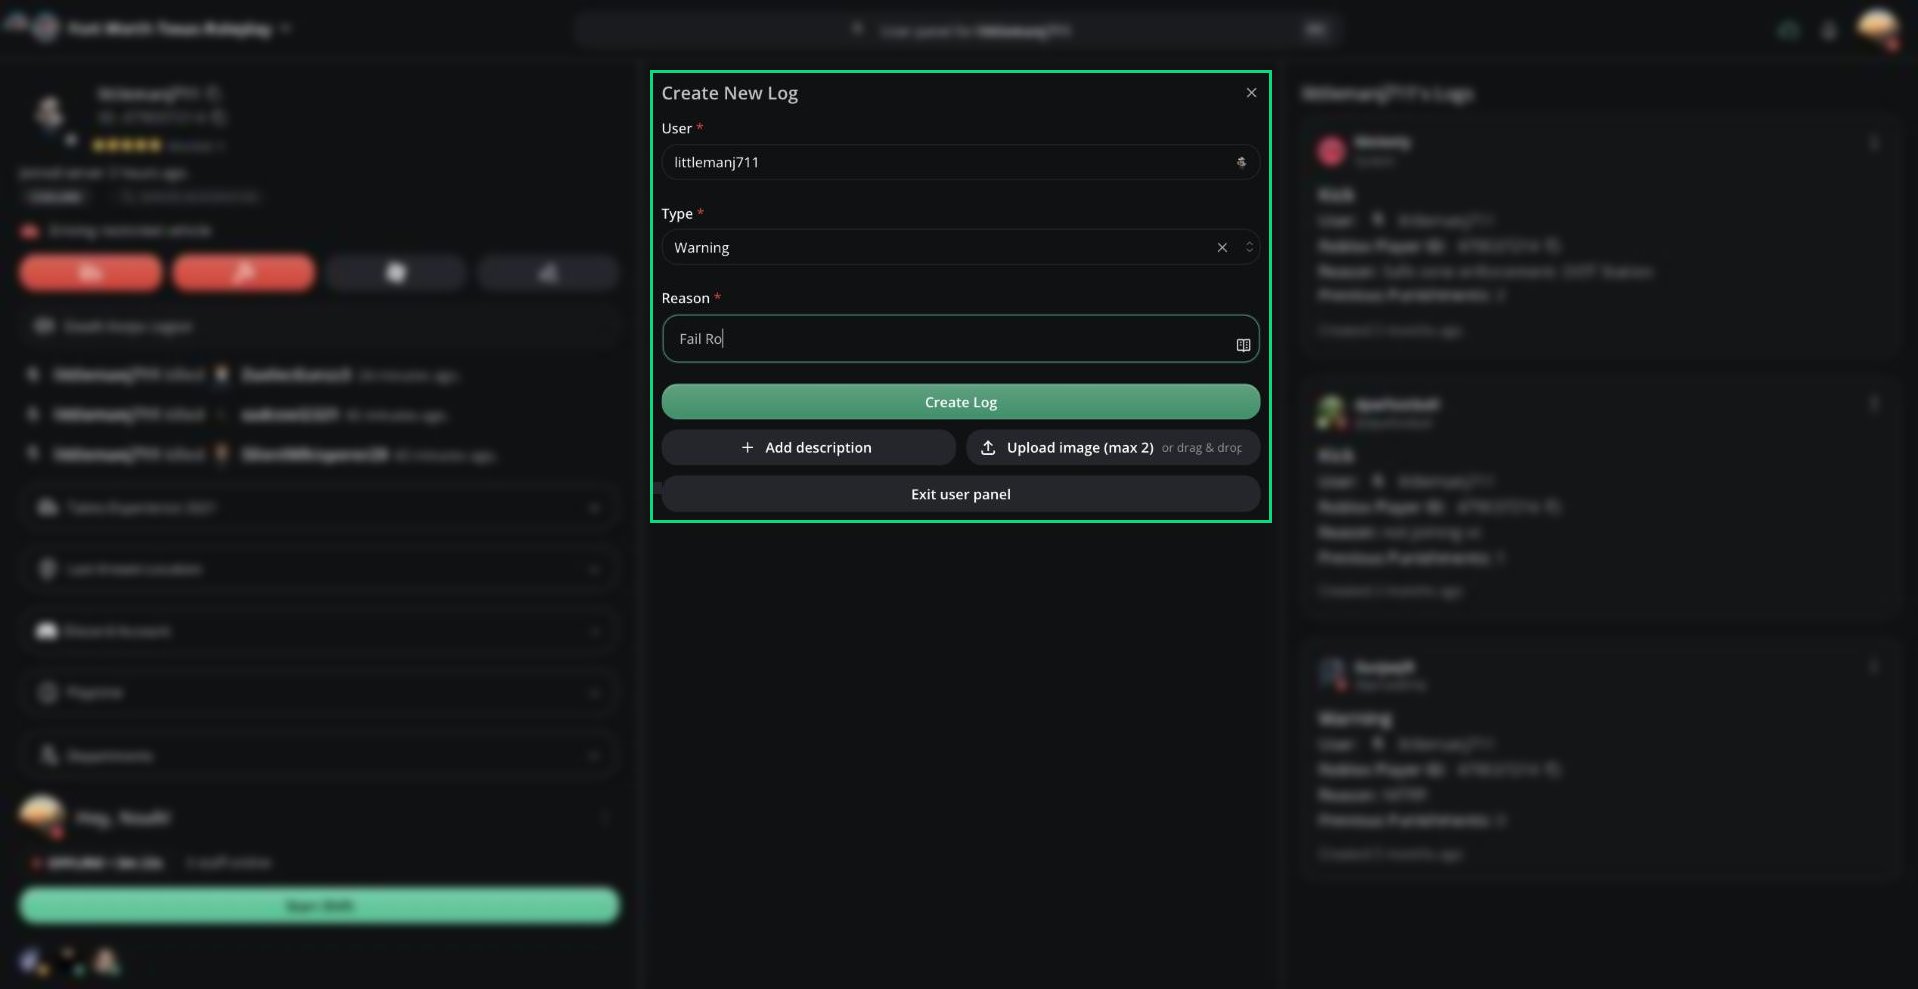
Create New Log
Creating a Log
1
Enter the player
Type a Roblox username in User, or press
Ctrl + I to jump to the field. Press Tab to accept a suggestion.2
Choose a type
Select a log Type. Types you don’t have permission for are greyed out.
3
Write a reason
Enter a Reason. Melonly suggests common reasons as you type; press
Tab to accept one.4
Create the log
Click Create Log or press
Ctrl + Enter.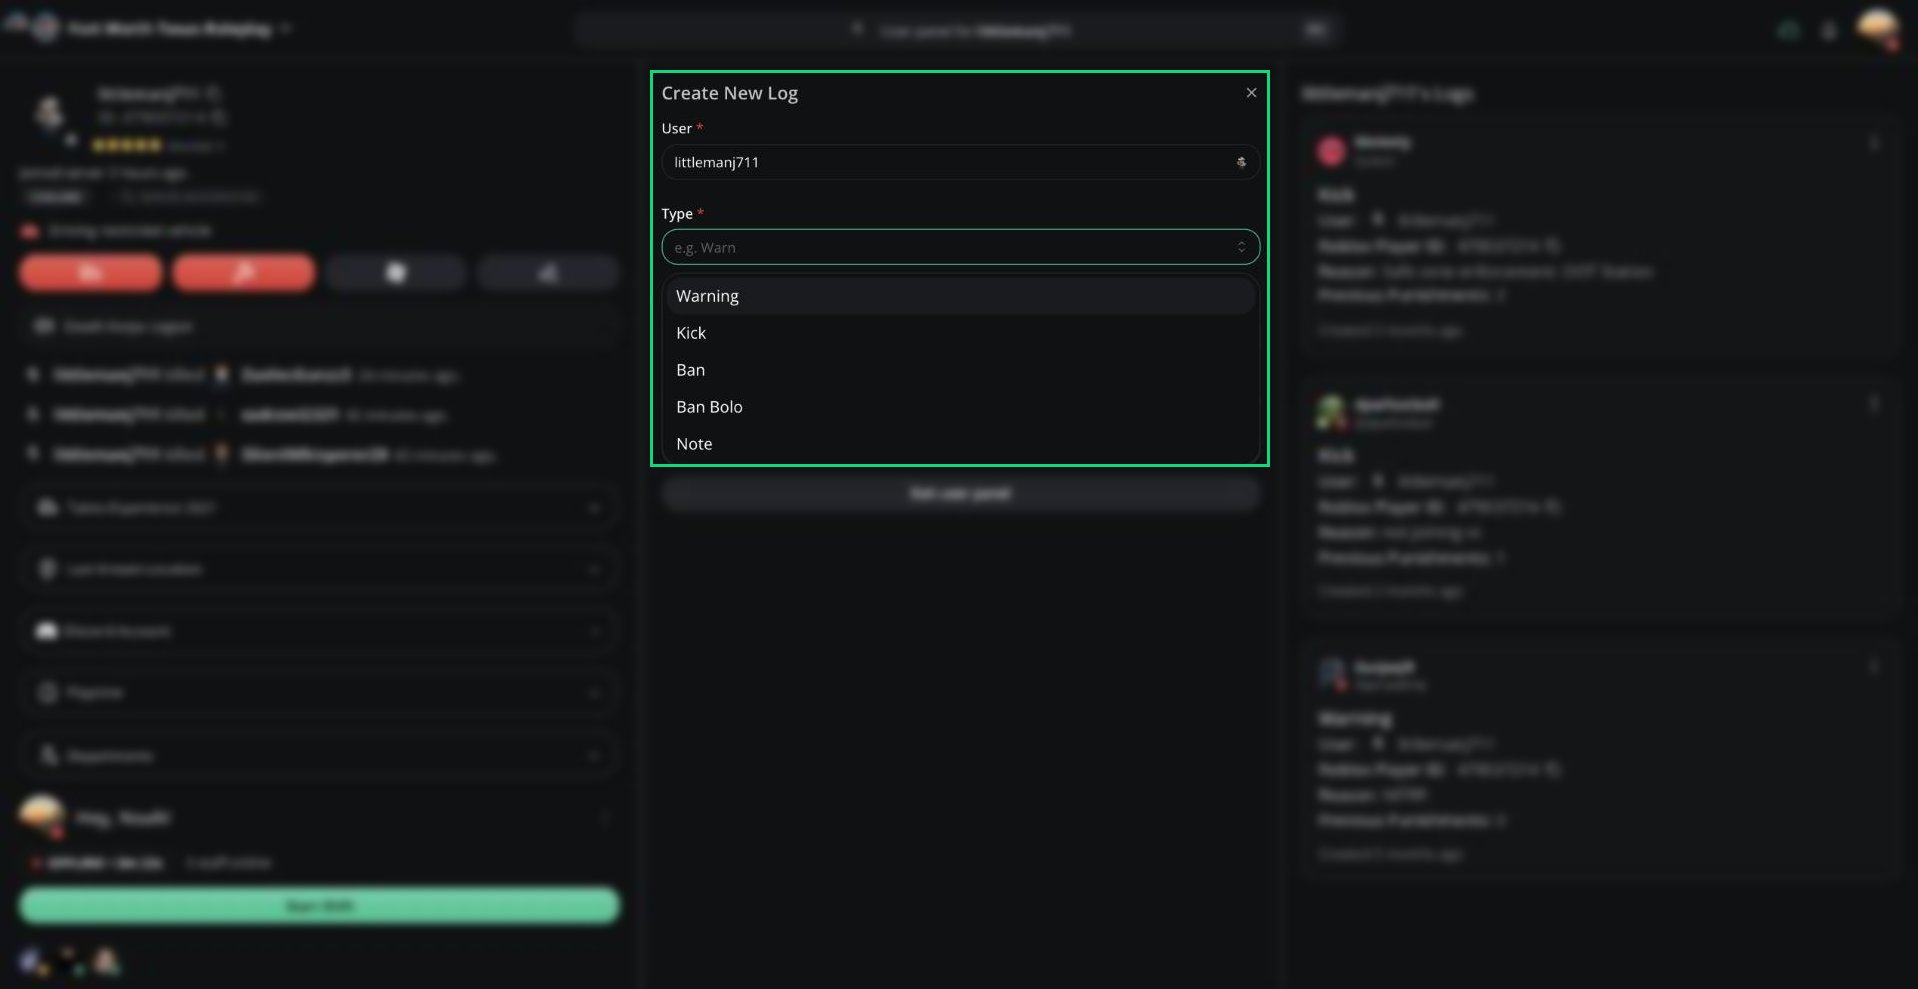
Log types
Reason box
The reason box supports a few extras:@mentions a Melonly user.:opens an emoji picker, including your Discord server’s emojis.- Links in the reason are clickable on the log.
Logging Multiple Players
You can log several players at once with the same type and reason.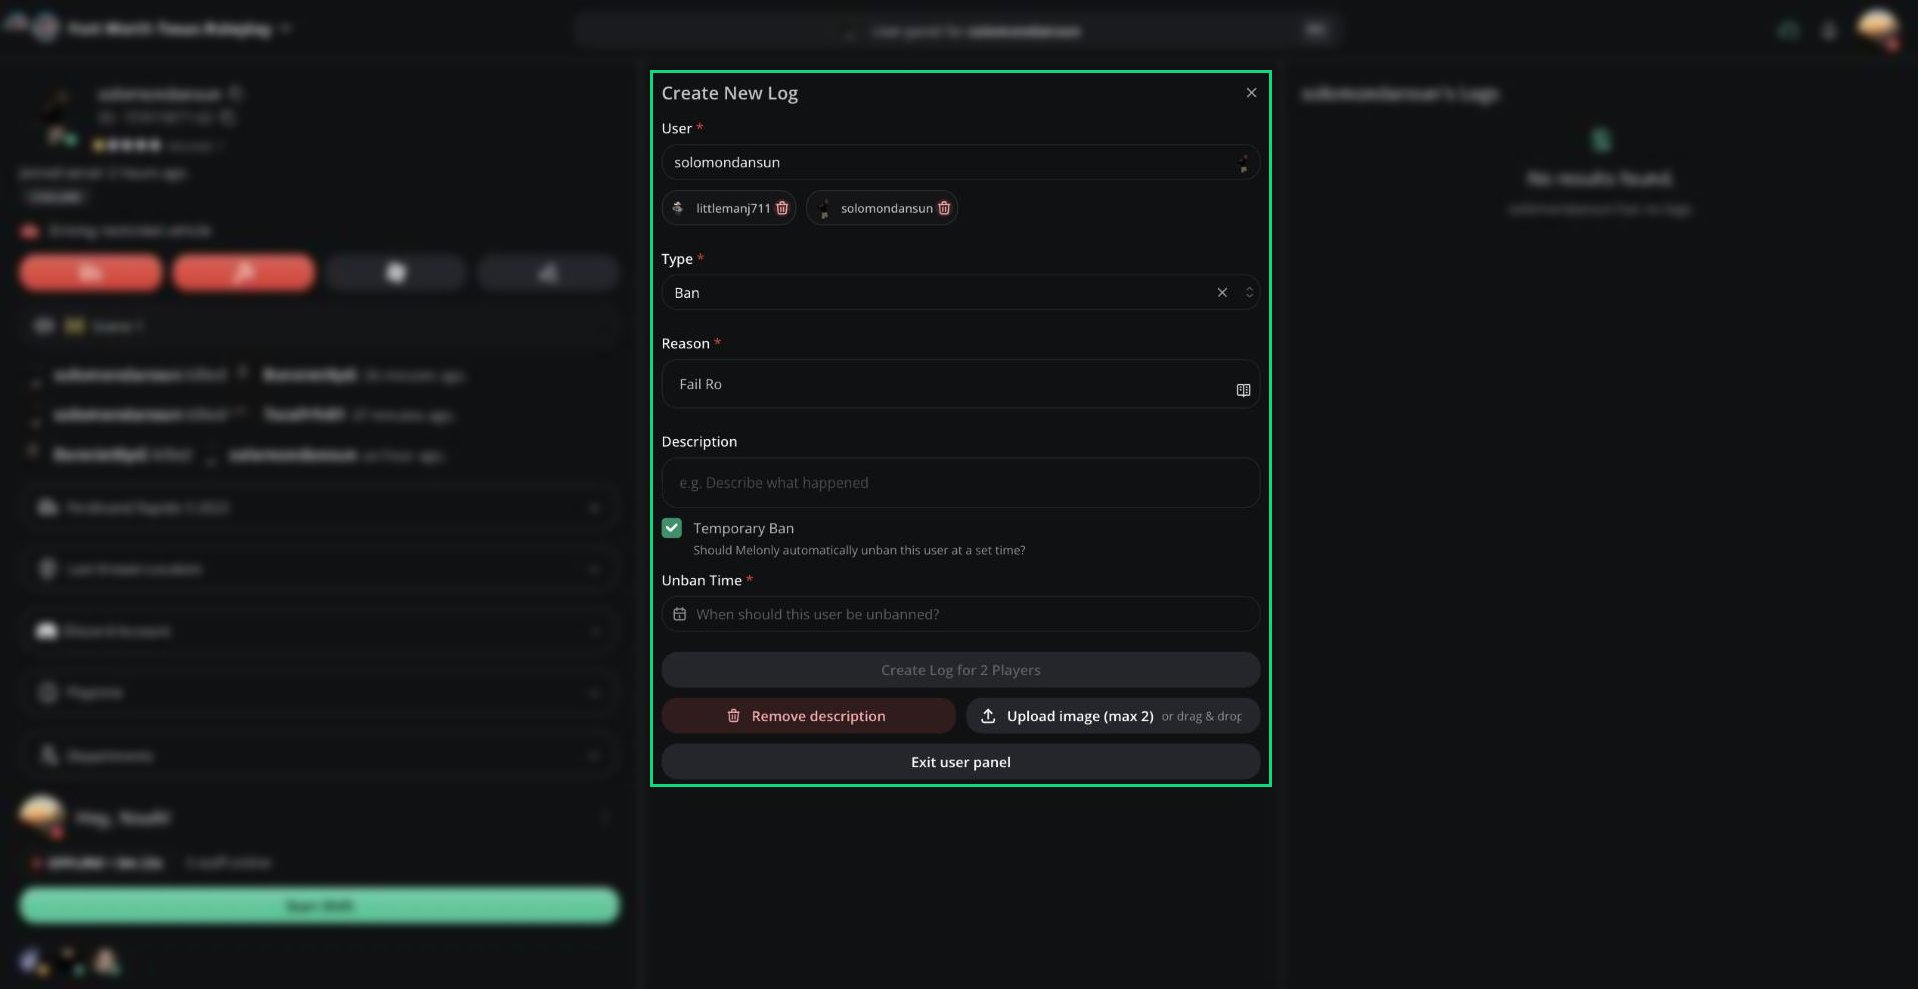
Multi-user log with a temporary ban
1
Add each player
Type a username and press
Enter. Repeat for each player.2
Fill in the log
Choose a type and reason as usual. Everything you add applies to every player.
3
Create the logs
Click Create Log. Each player gets their own separate log.
Descriptions
Requires Melonly Plus. Click Add description to add more detail under the reason. Use it for context, timelines, or clip links. Medal.tv clip links show up as clips on the log.Temporary Bans
Requires Melonly Plus. When the type is Ban, tick Temporary Ban and choose an Unban Time (up to 1 year away). Melonly unbans the player automatically, and the log shows when the ban ends.Proof Images
Requires Melonly Plus. Click Upload image or drag images onto the form. You can attach up to 2 PNG or JPEG images.Punishment Presets
Presets are saved punishments with a name, reason, type, and optional temporary ban length. They require Melonly Plus and are set up under Dashboard → Panel.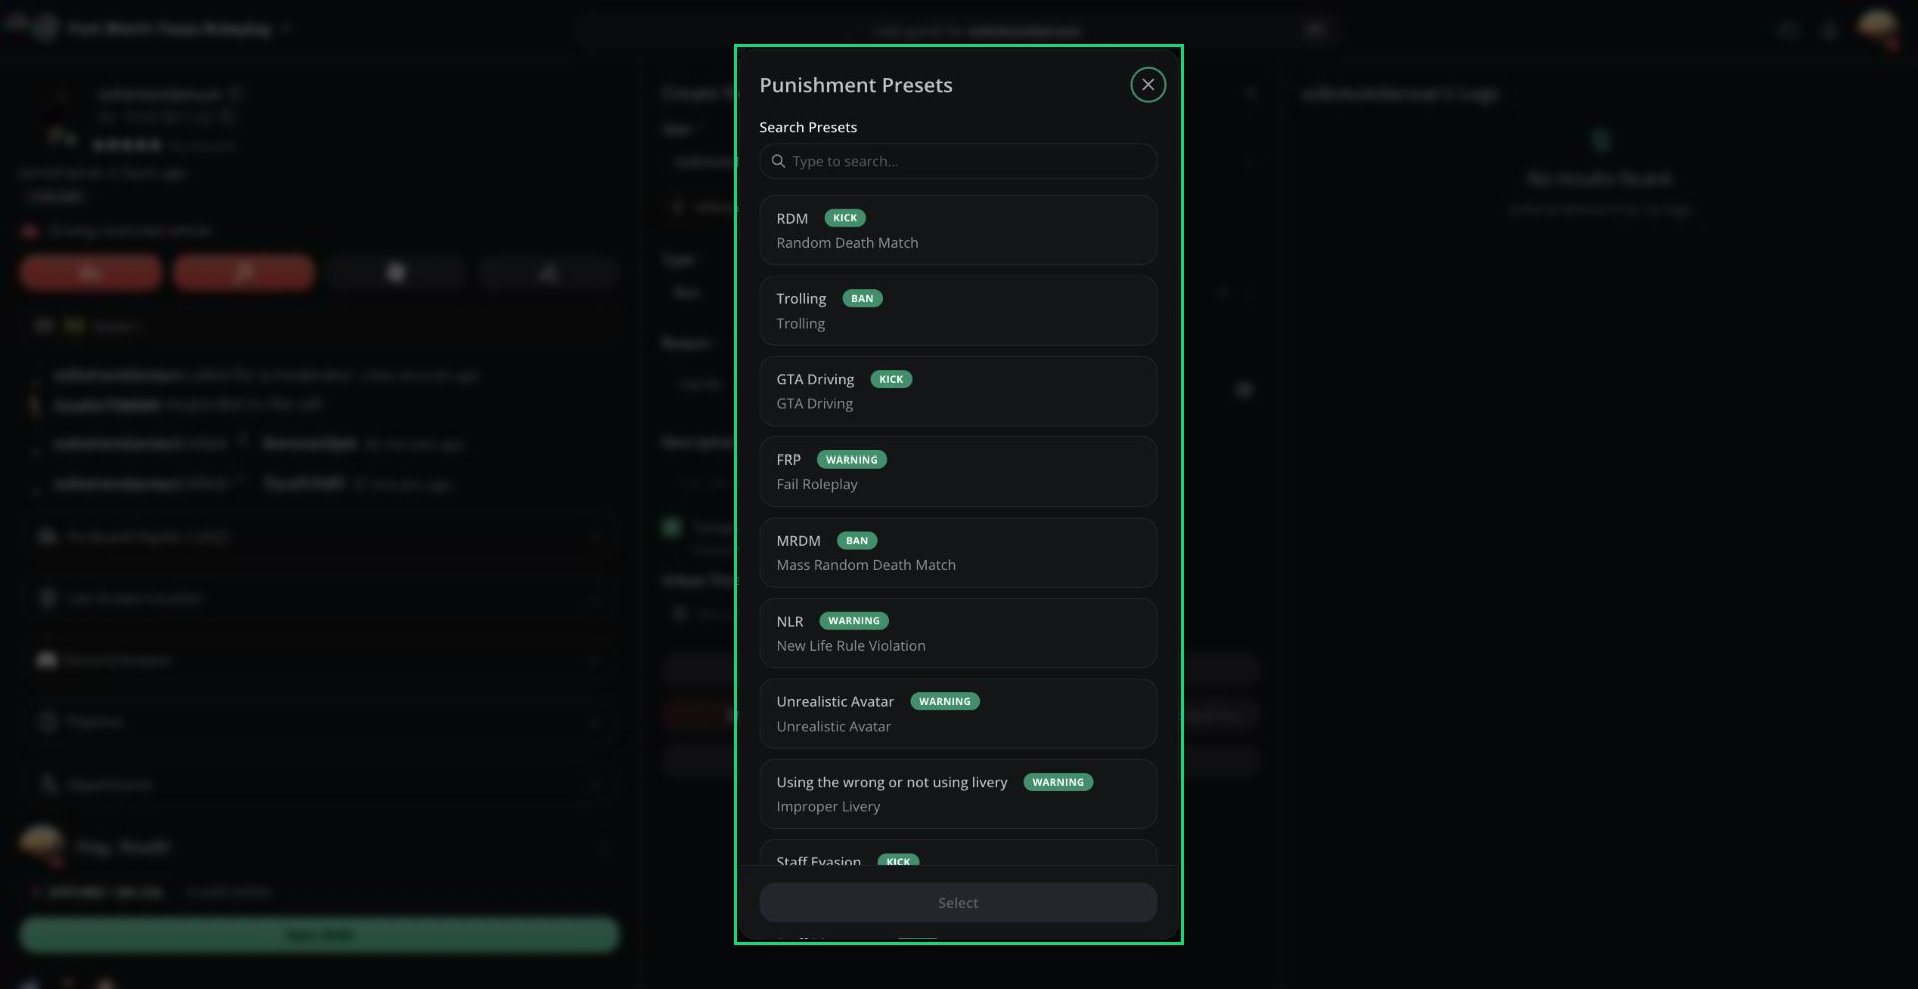
Punishment Presets
1
Open presets
Click the book icon in the Reason box, or press
Ctrl + P.2
Choose presets
Click one or more presets to select them, then click Select. Double-click a preset to apply it straight away.
3
Review and create
The reasons are combined, and the type is set to the most severe one you picked. If a Ban preset has a duration, the temporary ban is filled in for you.
Resetting Previous Punishments
Requires the Reset previous punishments count permission.
Need help?
Still have questions? Join our Discord server for support from the Melonly Team.