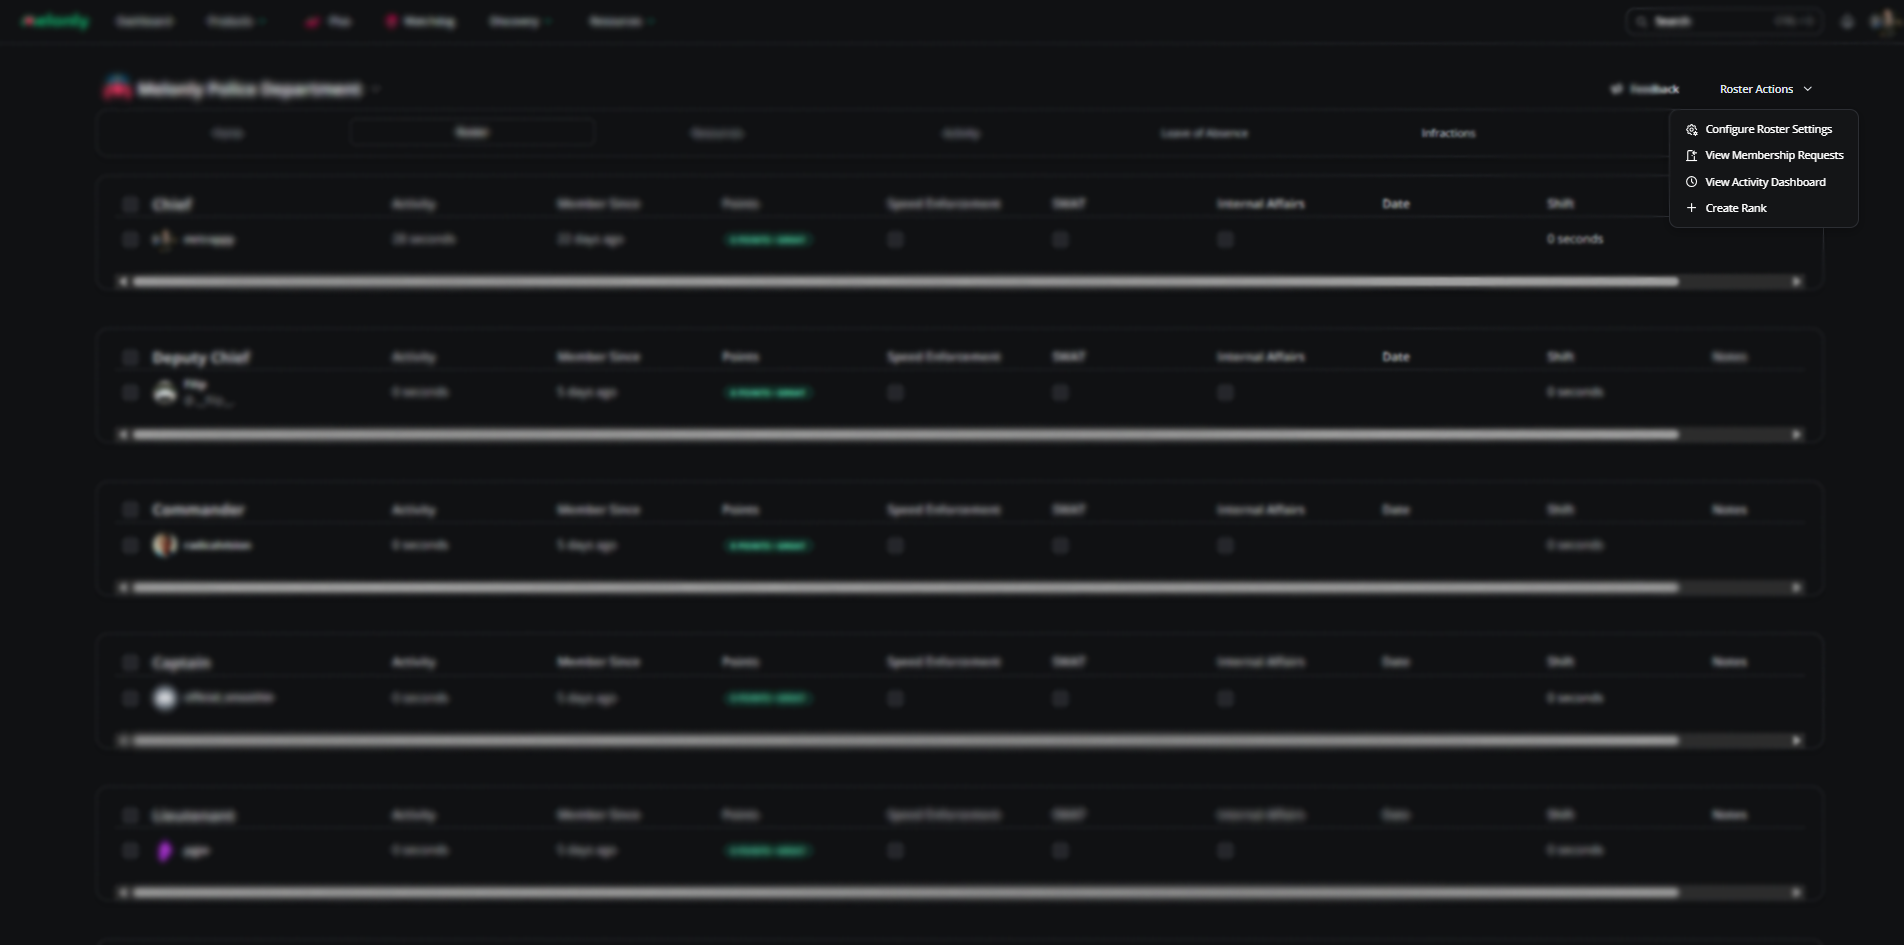
Roster Page Overview
The roster module provides a comprehensive set of administrative controls for user management. Administrators can assign users to specific ranks, adjust rank hierarchies, promote or demote members, and organize users systematically. This functionality ensures that user permissions and access levels remain consistent with the organizational structure, enabling efficient oversight and streamlined management of all members within the system.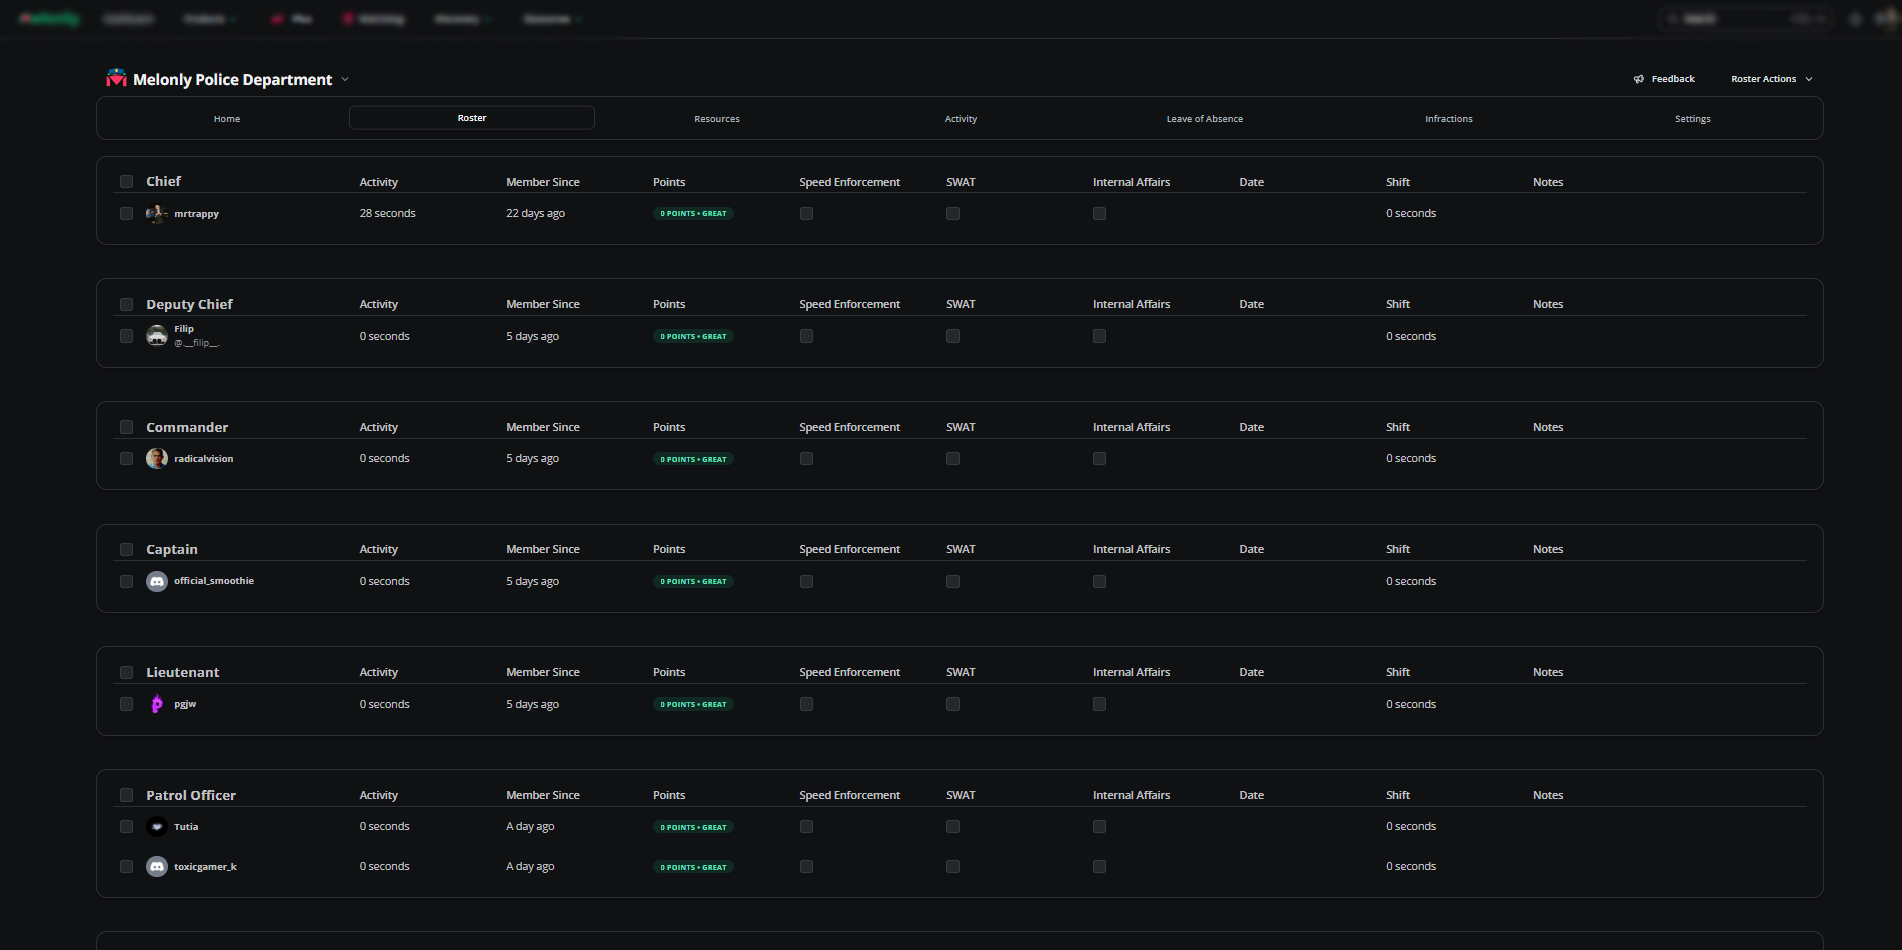
Roster Actions
In the top-right corner of your roster, above the settings icon, you’ll find the “Roster Actions” dropdown button, which contains several critical functions.Configure Roster Settings
Configure Roster Settings
Configure Roster Settings
Learn more about this here!
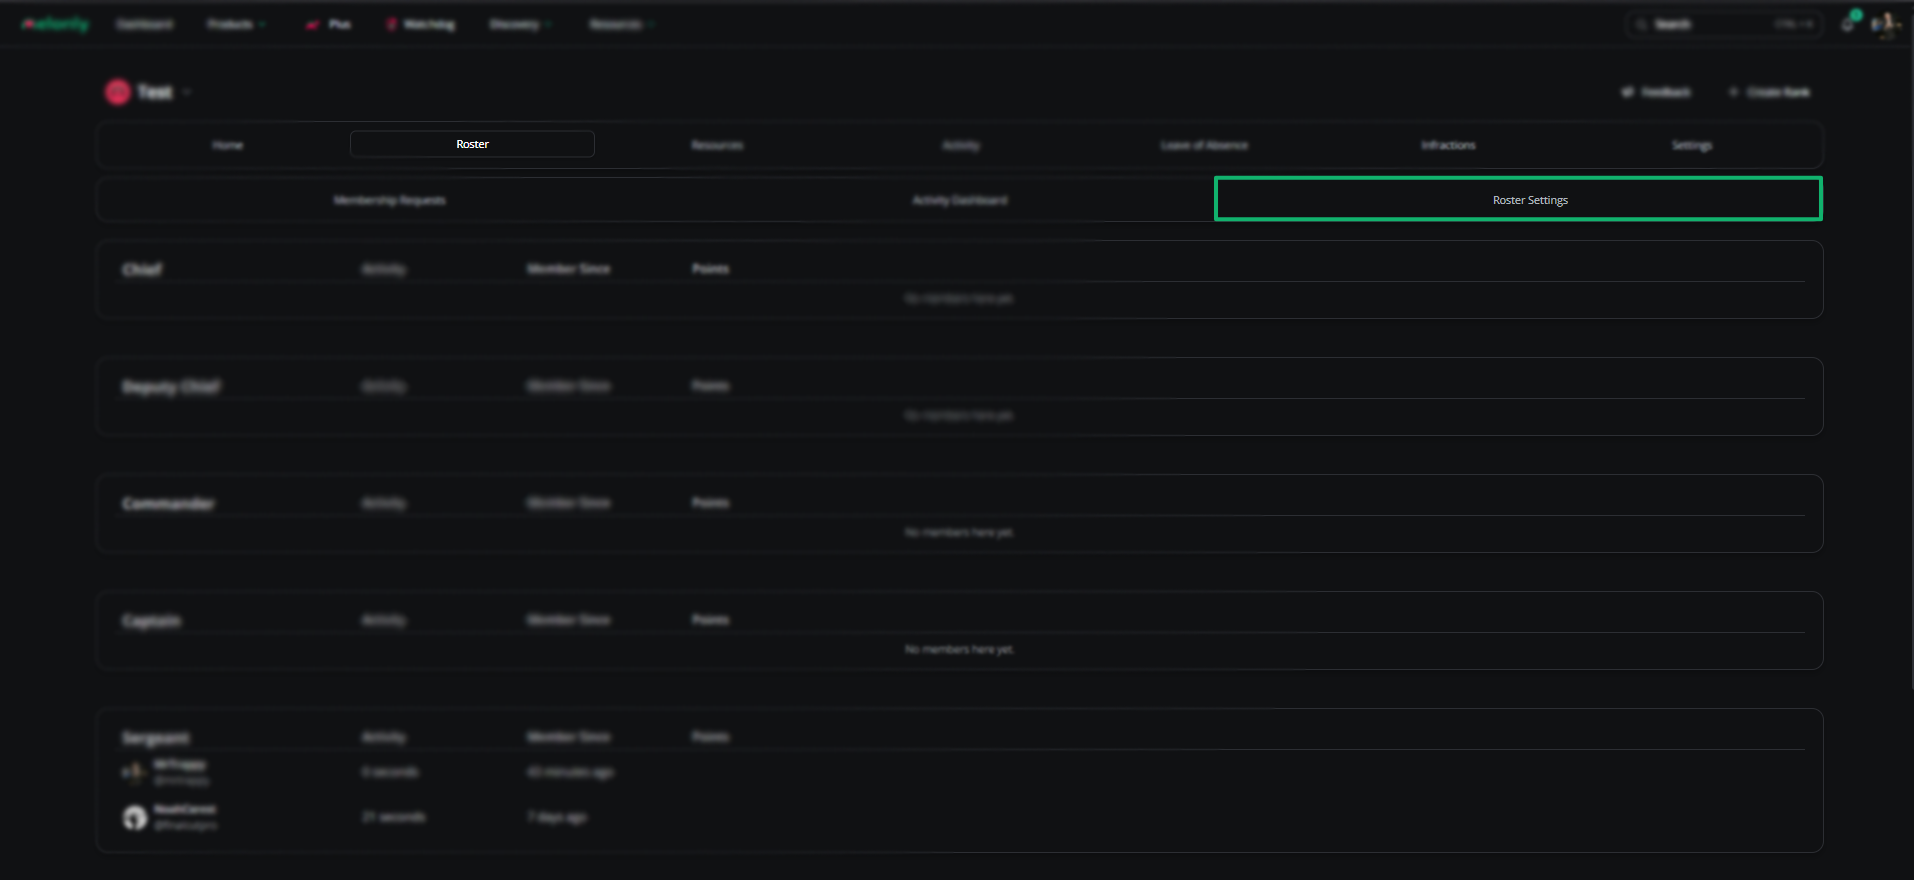
How to access Roster Settings
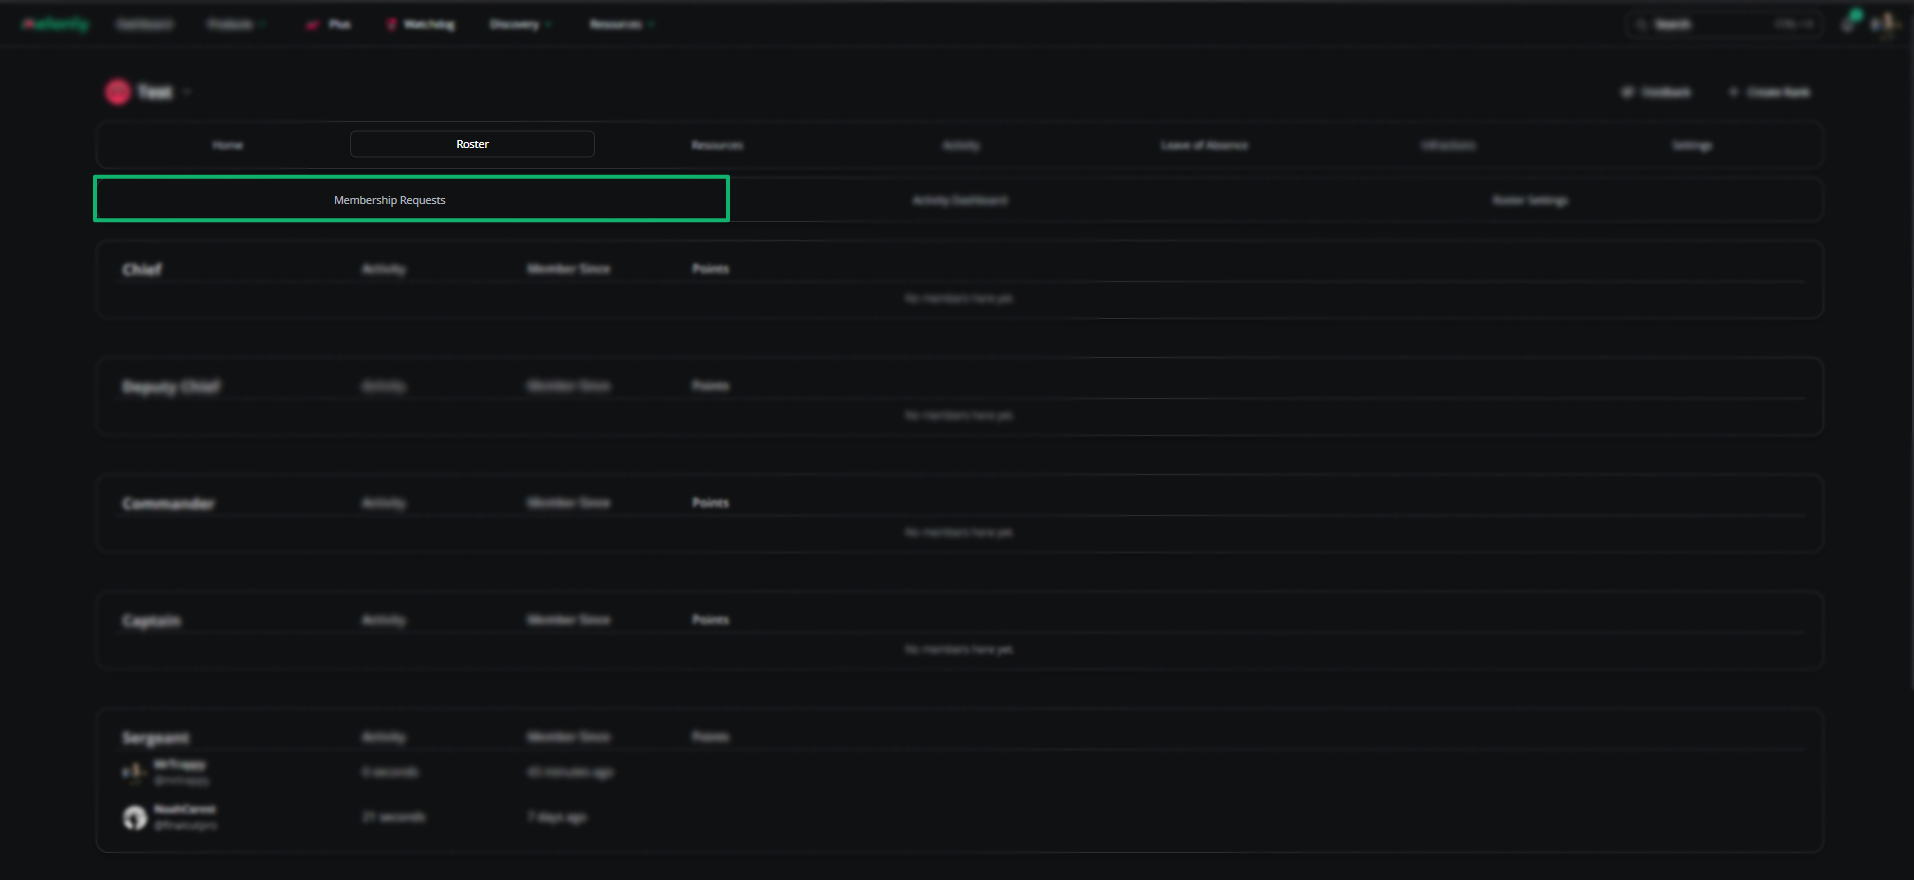
Review Membership Requests
Review Membership Requests
Review Membership Requests
This process can be bypassed by using Linked Roles.
Example of the requests page
Removing Members
Removing Members
Administrator or Member Page permissions are required.

Example of how to remove a member from your Melonly server.
View Activity Dashboard
View Activity Dashboard
View Activity Dashboard
Learn more about this page here!
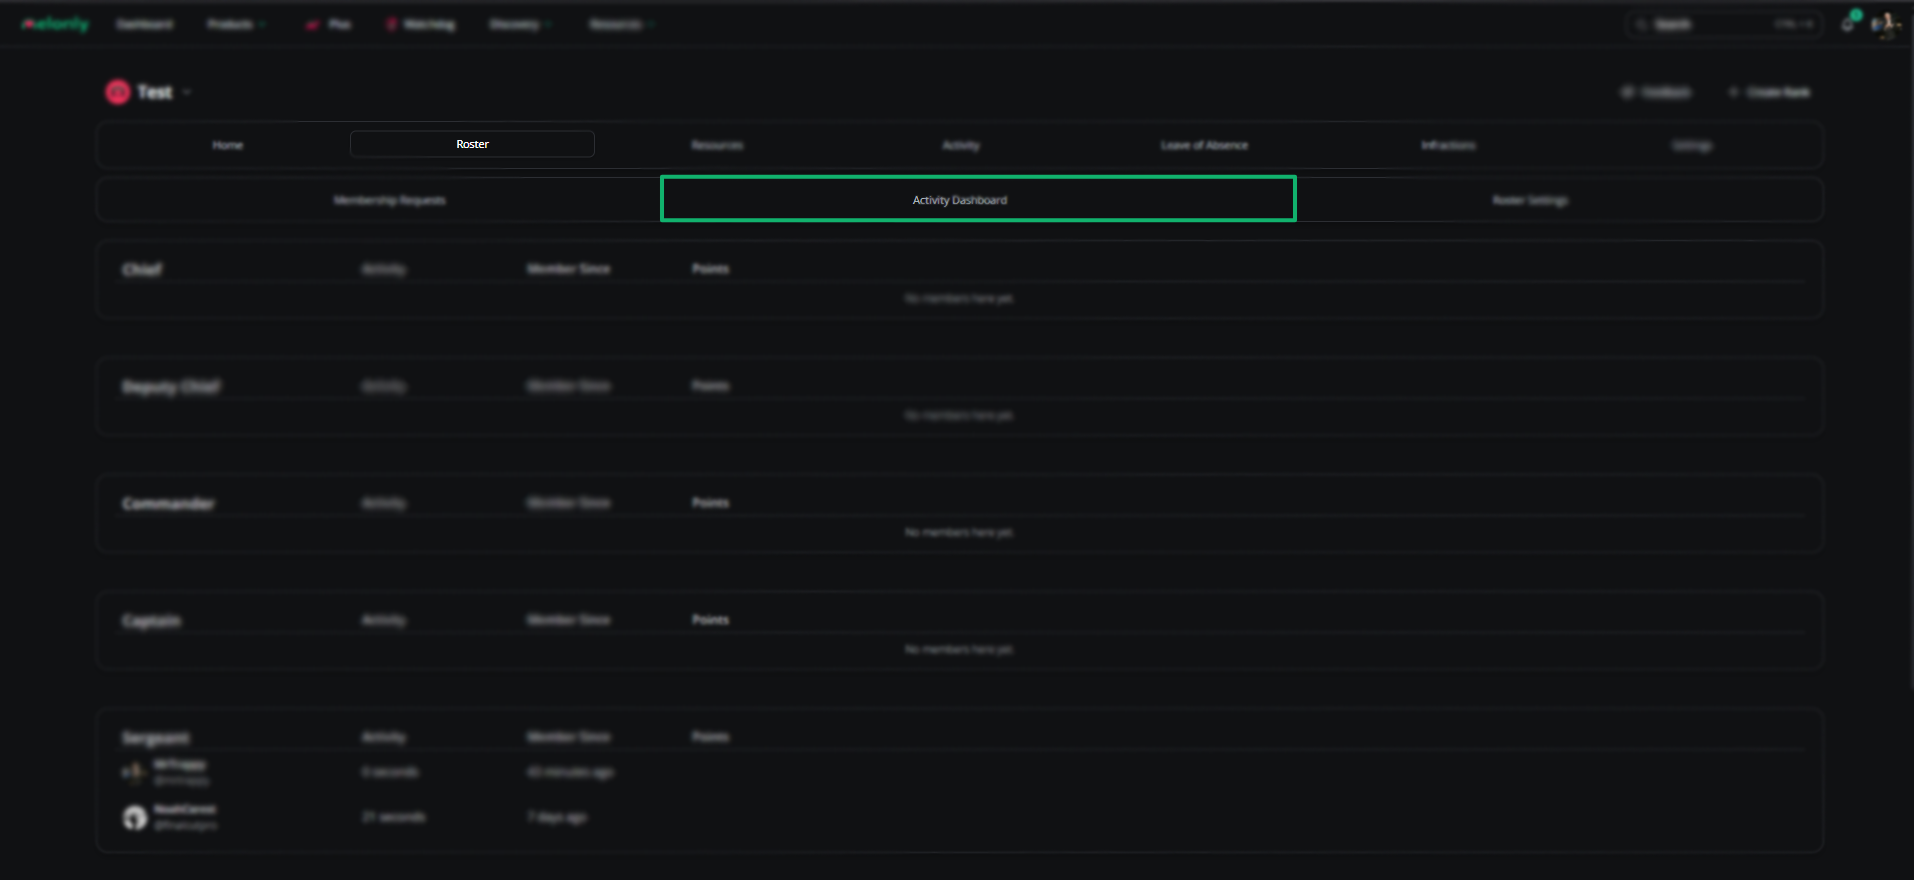
How to access activity Dashboard
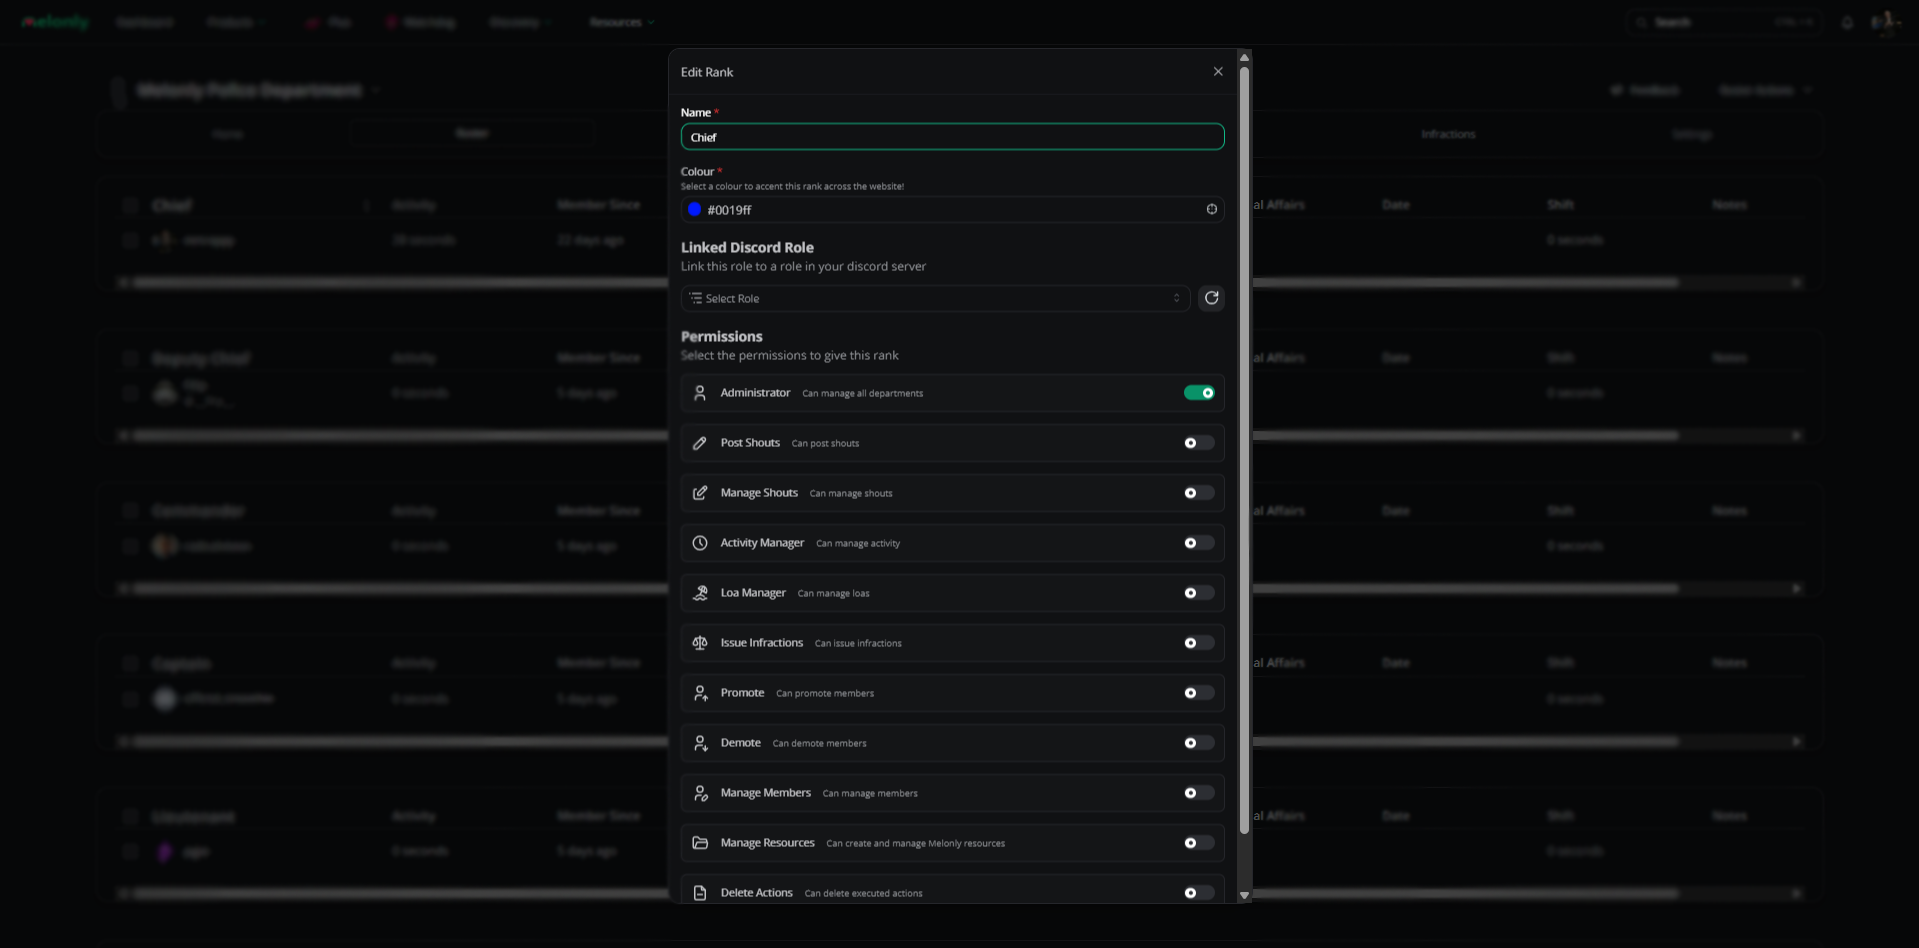
Create Rank
Step-by-Step: How to Create a Rank
Step-by-Step: How to Create a Rank
Press 'Create Rank'
Located in the Action Dropdown Button.
Fill Out the Rank Details
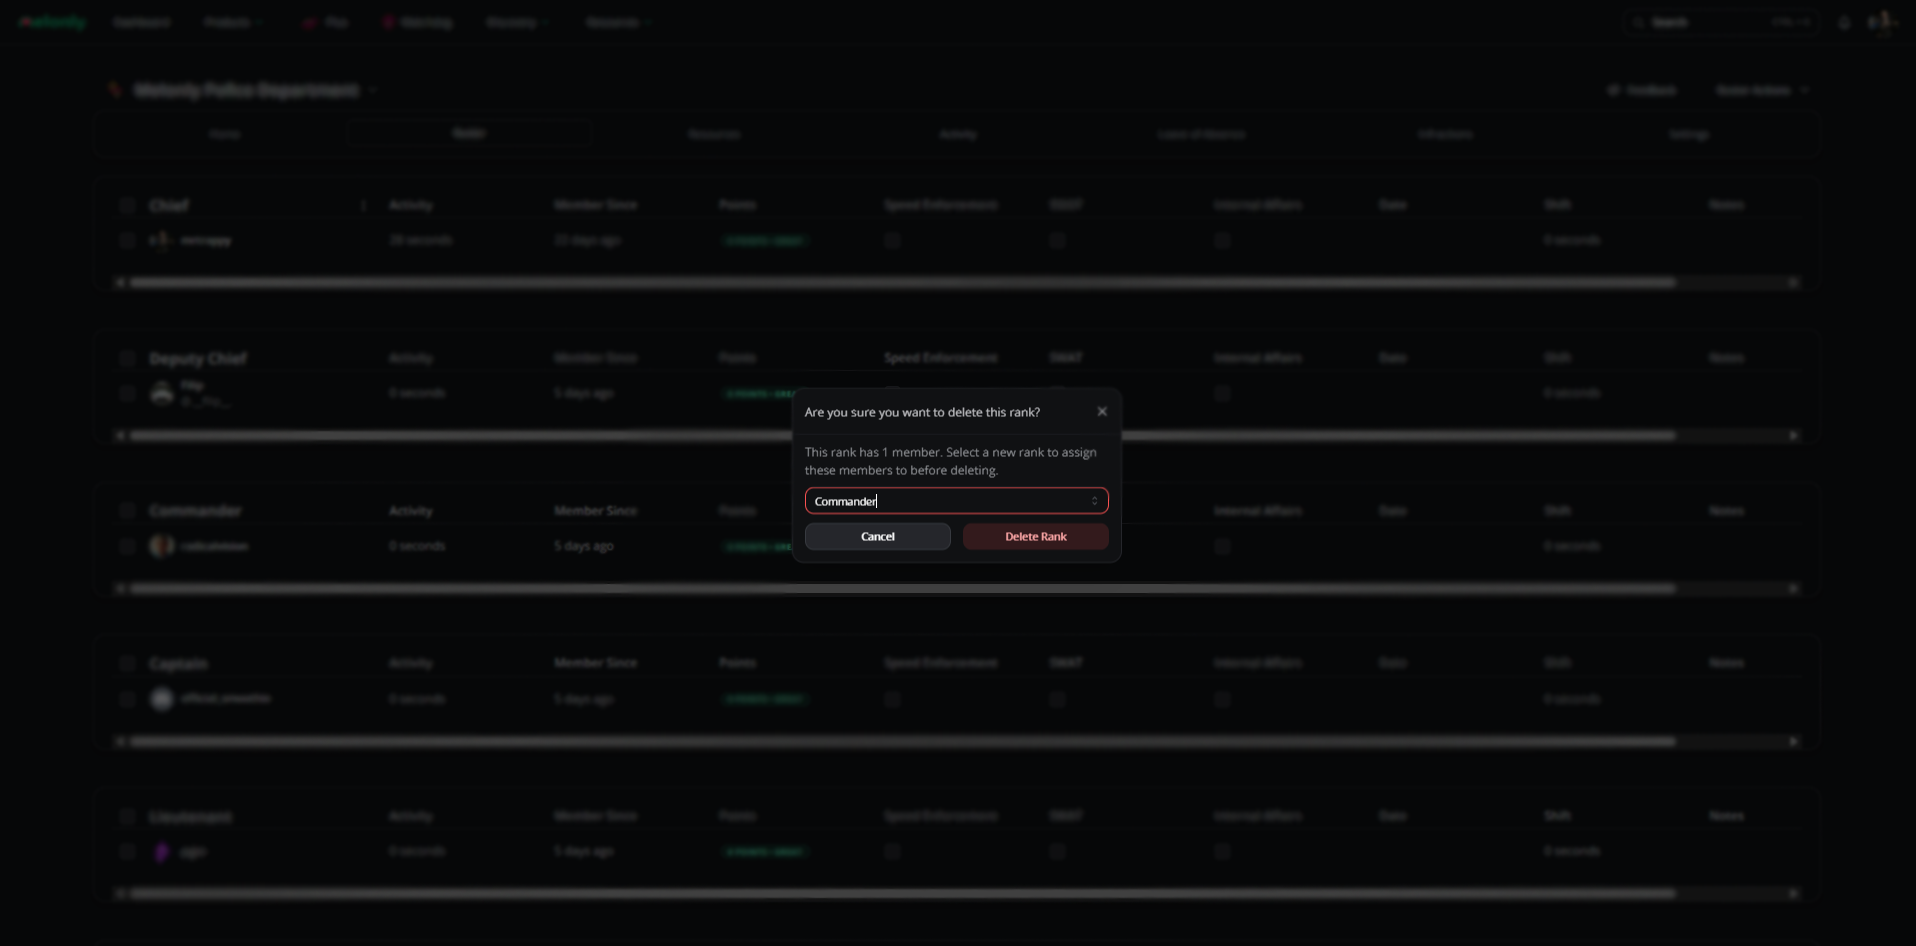
Rank Management
Rank management is a crucial aspect of the roster. This section allows you to manage each rank after it’s created — including editing, deleting, or moving ranks up or down in the hierarchy.How to Edit a Rank
How to Edit a Rank
Hover over the rank you want to edit.
Click on the Menu

Click 'Edit'
How to Delete a Rank
How to Delete a Rank
Hover over the rank you want to delete.
Click on the Menu
Click 'Delete'
How to Move a Rank
How to Move a Rank
Hover over the rank you want to move.
Click on the Menu
Select 'Move Up' or 'Move Down'
Roster
Promotion
With the new Promotion Feature on the roster, you can promote members who have shown great service to their department!How to Promote
How to Promote
Select Members
You can also promote an entire rank by selecting the rank name.
Choose 'Promote'
Finalize the Promotion
Once selected, you’ll have options to add another user, create a shout, DM promoted members, or schedule a date.
Create a Shout (Optional)
Add stickers, emojis, or Add stickers, emojis, or GIFs to personalize it, then press “Create Now” to finalize the promotion.
Promotion Features
Promotion Features
| Feature | Description |
|---|---|
| Add Member | Add additional members to the promotion list. |
| Create Shout | Announce promotions to the entire department. |
| DM Promoted Member | Send a direct message to promoted members. |
| Scheduled Date | Set a specific date and time for the promotion to take effect. |
Demotion
With the Demotion Feature, you can demote members who have not met the department’s standards or performance expectations.How to Demote
How to Demote
Select Members
You can also demote an entire rank by selecting the rank name.
Choose 'Demote'
Finalize the Demotion
Once selected, you’ll have options to add another user, create a shout, DM demoted members, or schedule a date.
Create a Shout (Optional)
Add stickers, emojis, or GIFs to personalize it, then press “Create Now” to finalize the demotion.
Demotion Features
Demotion Features
| Feature | Description |
|---|---|
| Add Member | Add additional members to the demotion list. |
| Create Shout | Announce demotions to the entire department. |
| DM Demoted Member | Send a direct message to demoted members. |
| Scheduled Date | Set a specific date and time for the demotion to take effect. |
Infraction
With the Infraction Feature, you can issue infractions to members who have violated department guidelines or failed to meet expectations.Infract
Infract
You may also press the “Guideline” button to automatically fill in the infraction reason and assigned points.
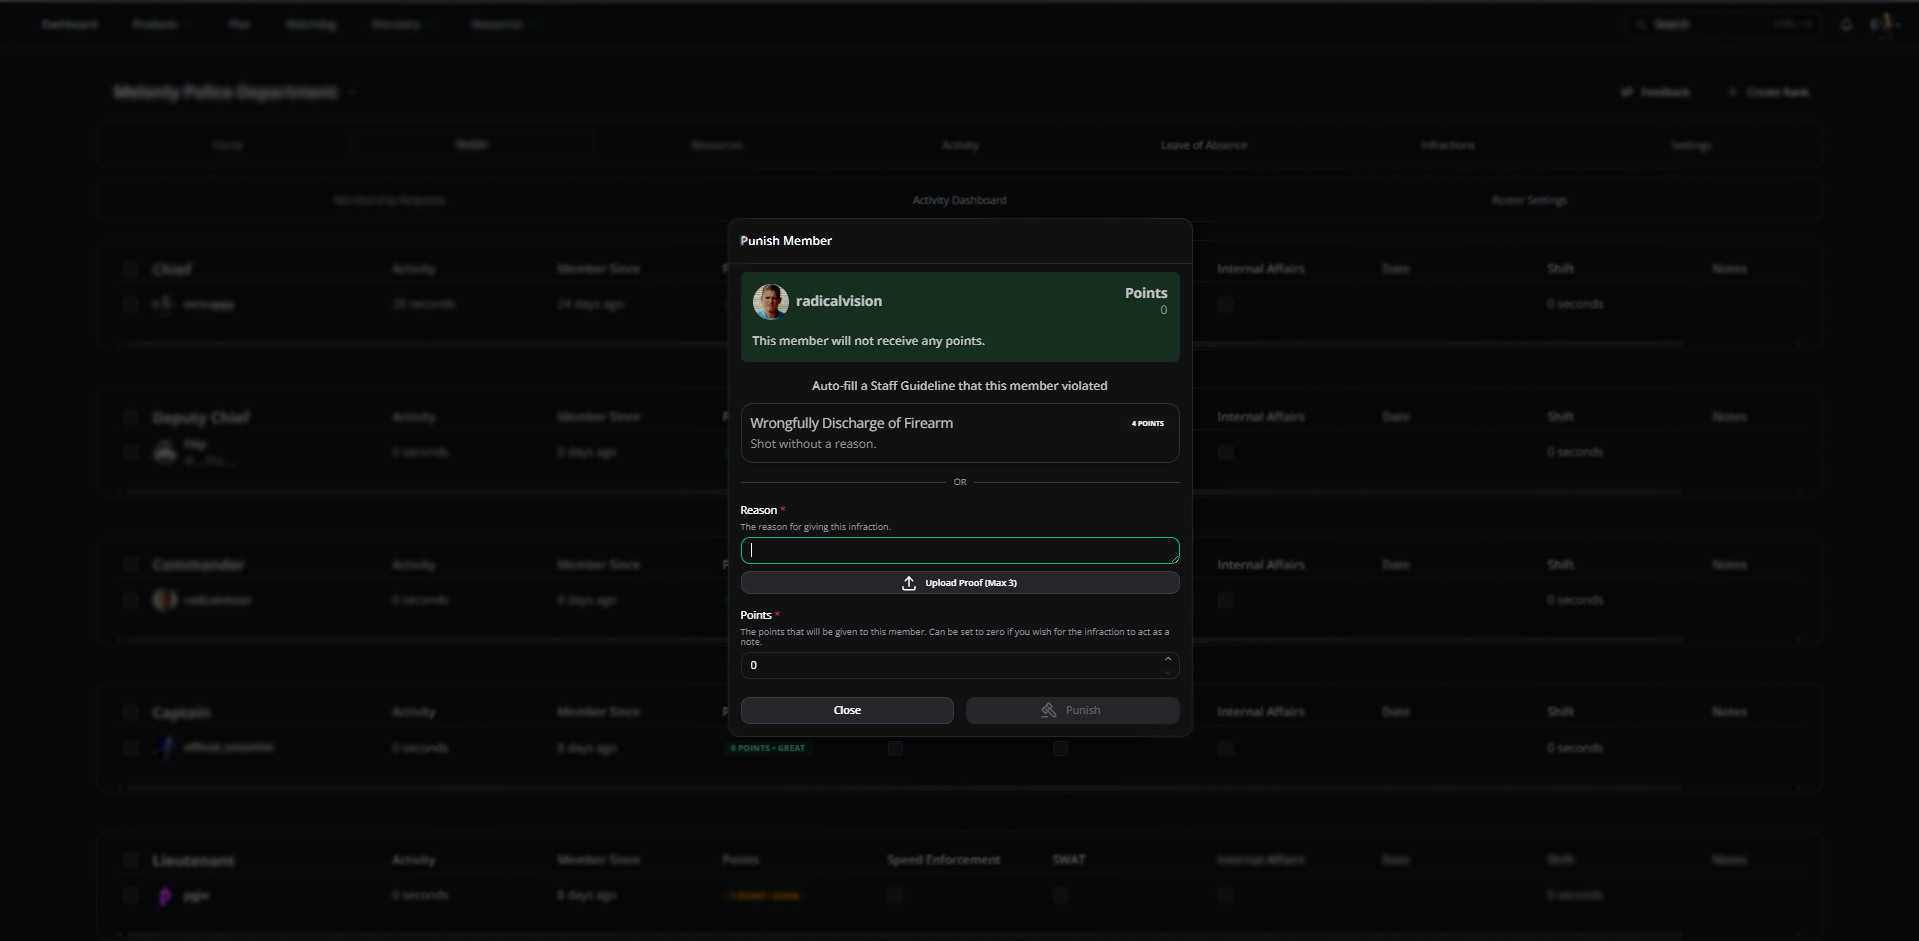
Example of how an infraction appears.
Suspension
With the Suspension Feature, you can temporarily suspend members who have violated policies or shown poor performance.Suspend
Suspend
Make sure to select an end date to automatically unsuspend the member.
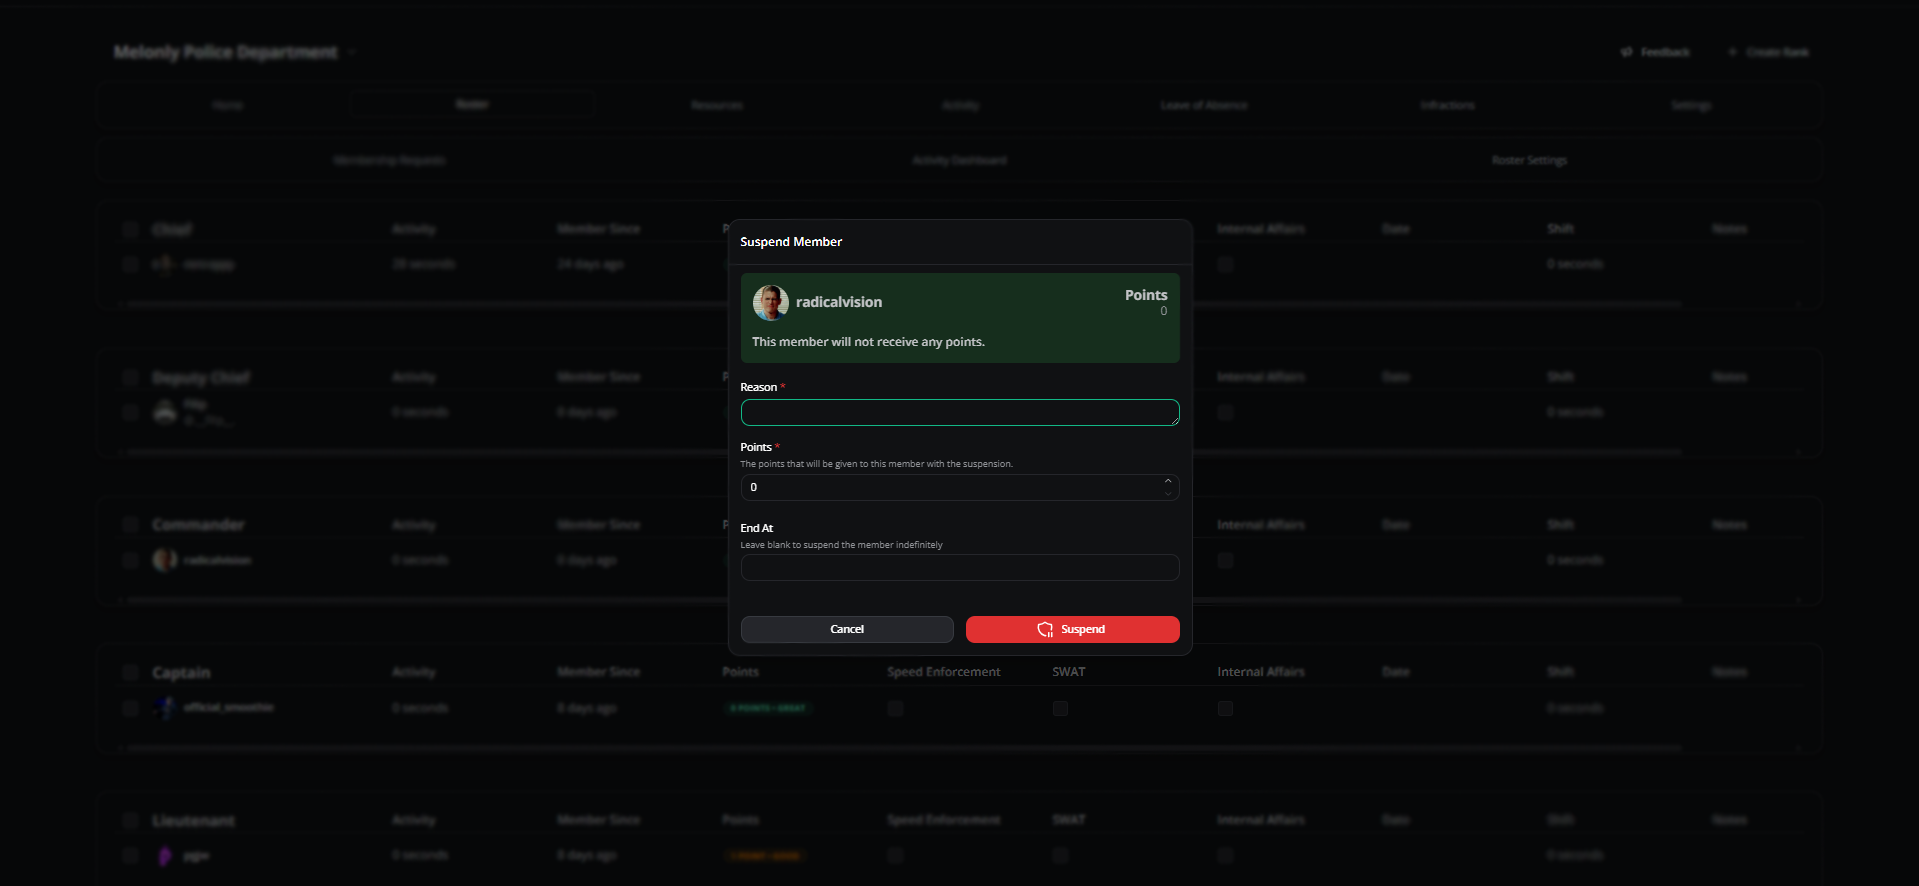
Example of how suspension appears.
Termination
With the Termination Feature, you can permanently remove members who are no longer fit to serve in your department.Termination
Termination
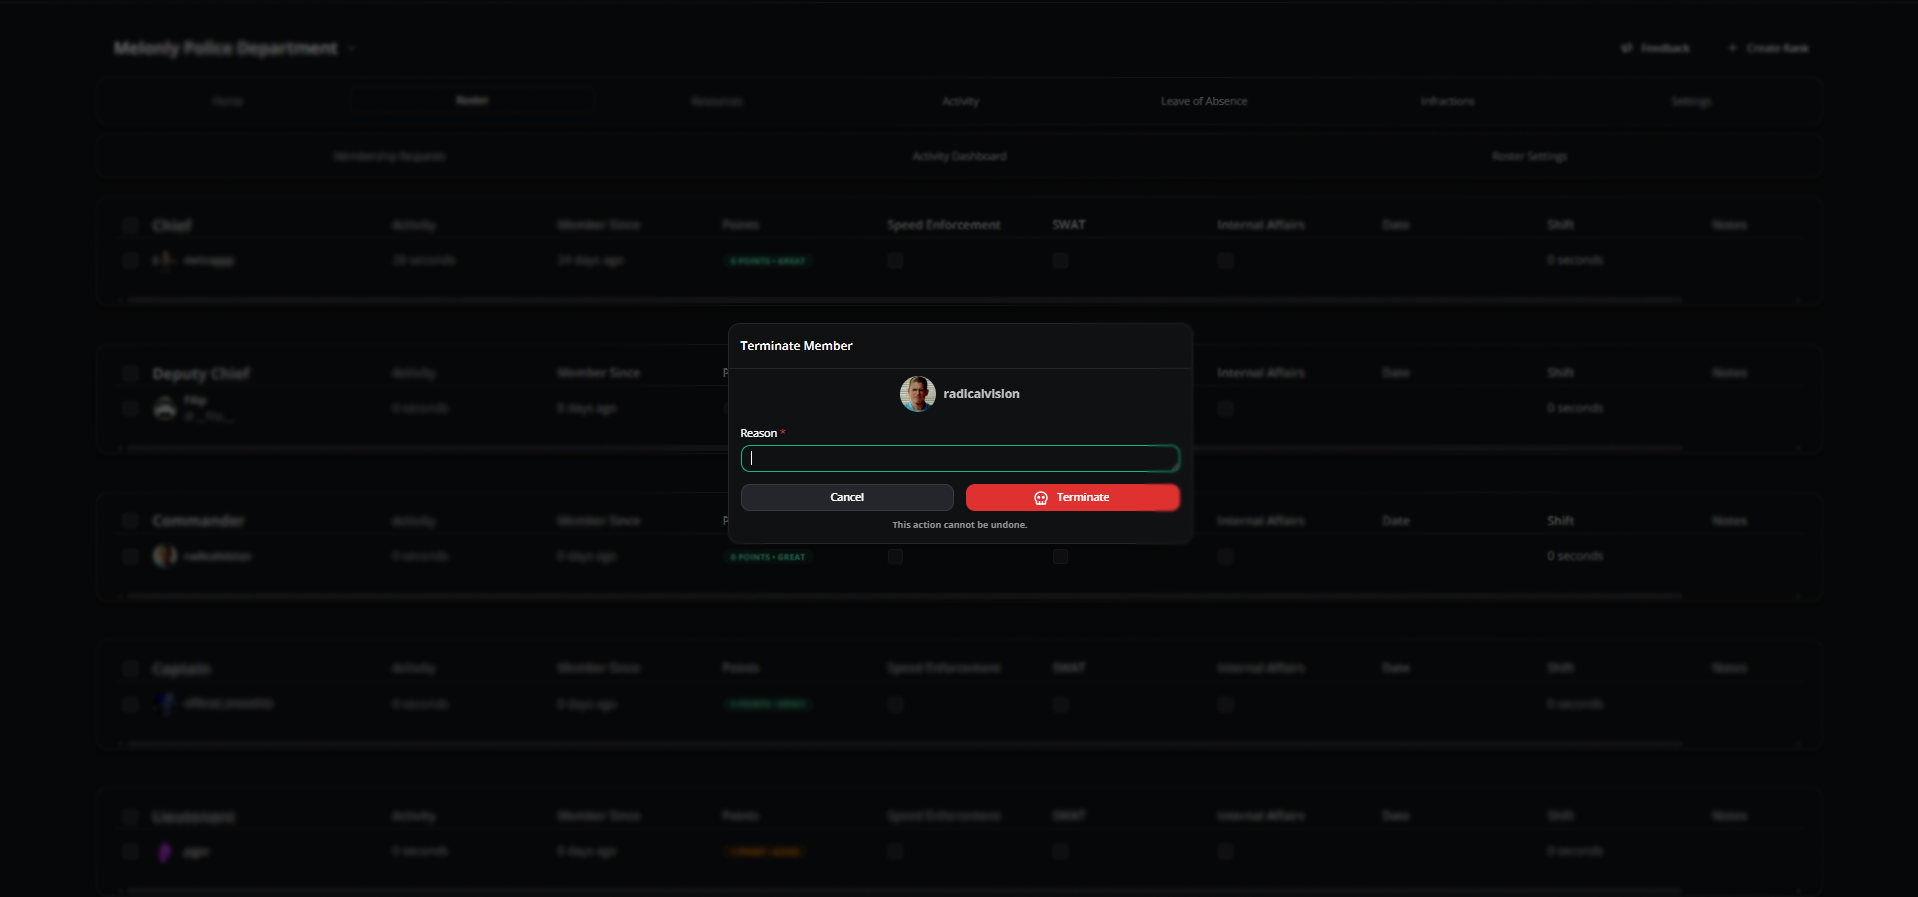
Example of how termination appears.
Melonly Support
Our staff team will be happy to assist you with any issues you may have.