> ## Documentation Index
> Fetch the complete documentation index at: https://docs.melonly.xyz/llms.txt
> Use this file to discover all available pages before exploring further.
# Layouts
> Arrange your CAD workspace with split panes, custom views, layout presets and favourites.
***
## How Layouts Work
Your workspace is split into panes. Each pane holds one panel, such as your assigned call, Active Units or Radio. You can add, resize and rearrange panes, then save the result as a layout.
 | Panel | Default layout |
| - | - |
| Police, Fire, EMS, DOT | Your assigned call on the left, with Active Units above your unit groups on the right. |
| Dispatch | The PSAP Standard preset. |
| Law | Warrants, licences and bonds cards. |
Unit groups are called Active Squads on Police, Active Apparatus on Fire, Active Rigs on EMS and Active Vehicles on DOT.
Layouts, views and favourites are saved on this device and browser, per panel type. Use a share code to move them to another device.
***
## Split Panes
### Adding a pane
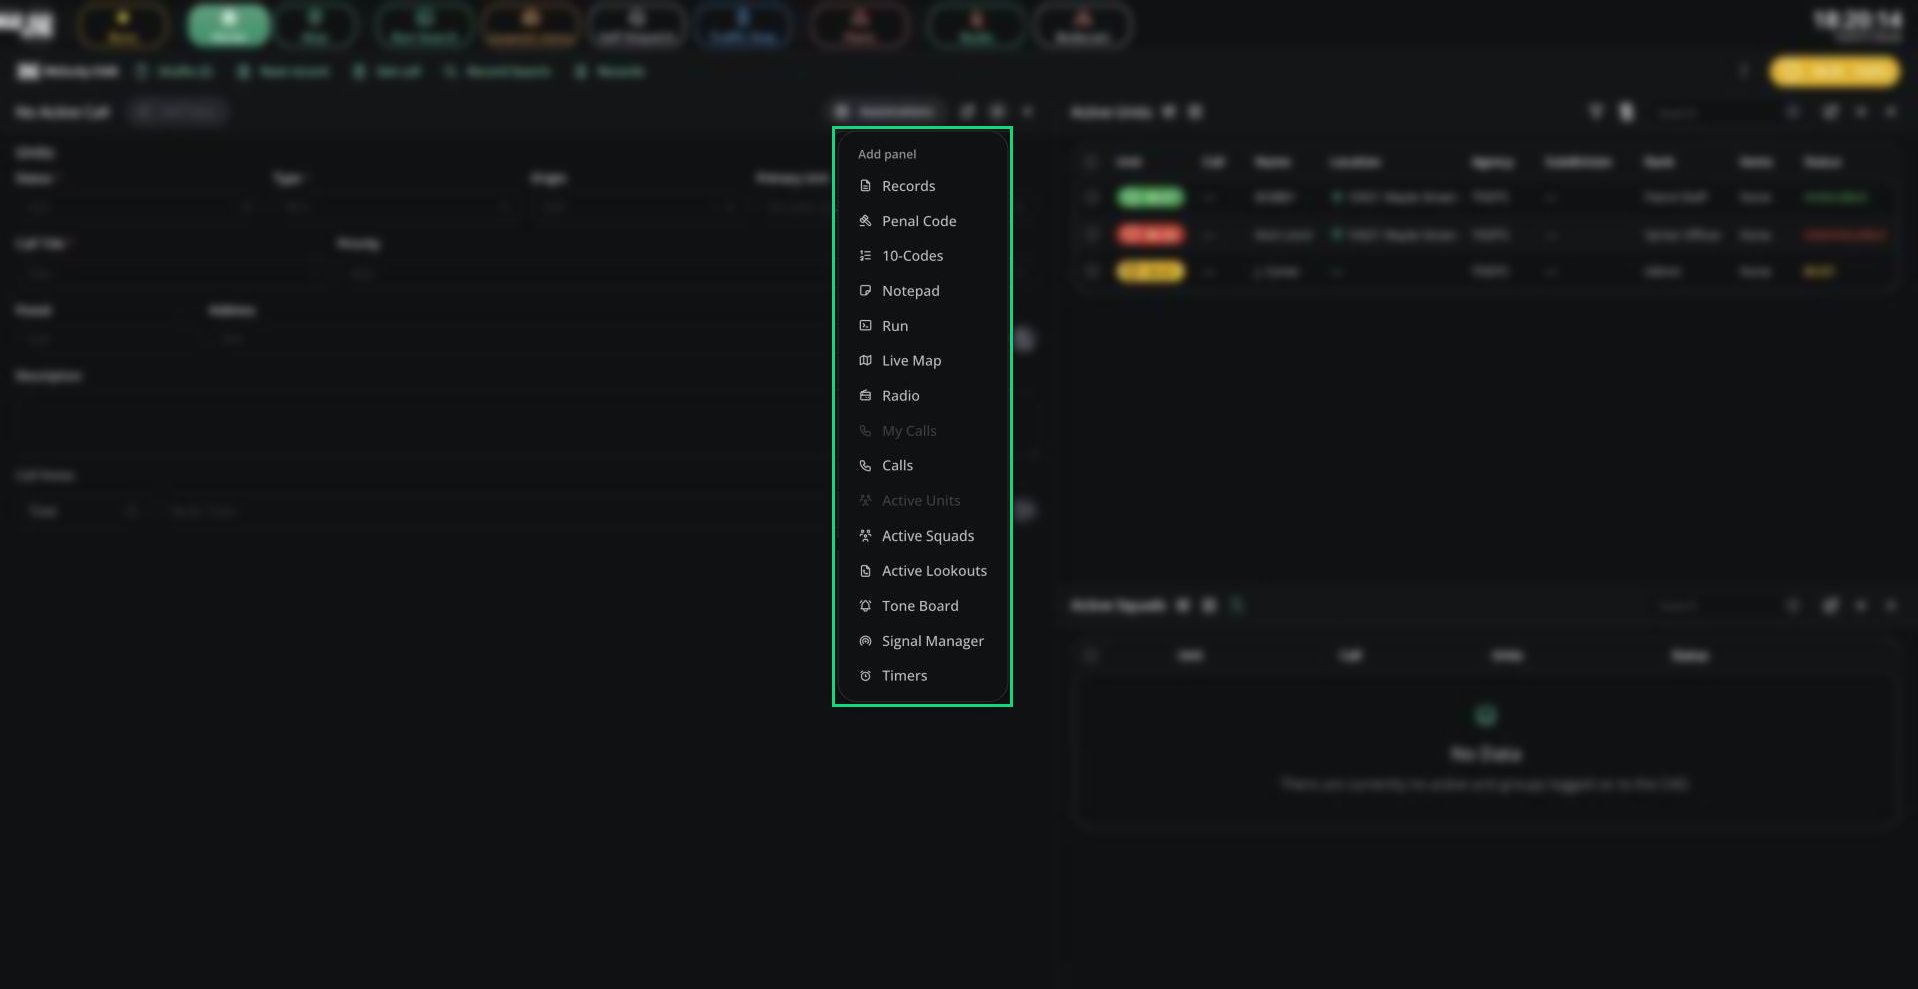
Every pane has an **Add panel** button in its header.
Panels already in your layout are greyed out. Unit groups and Radio Quick-Actions can be added more than once.
Pick a new row above or below, or a new column to the left or right.
### Managing panes
* Drag the dividers between panes to resize them.
* Click **Detach to window** to turn a pane into a floating window, and **Attach to layout** to put it back.
* Click **Close panel** to remove a pane. If you closed your calls pane, click **Restore calls** to bring it back.
What you can add depends on the panel. Most panels offer Run, Records, Calls, Active Units, unit groups, Radio, Tone Board, Signal Manager, Timers, Live Map, Penal Code and 10-Codes. Dispatch adds the Call Editor, Call History and Radio Quick-Actions, and Law adds its hearings, warrants, licences and bonds cards.
The Dispatch call editor can be split into panes too, for example call details next to assigned units. That layout is remembered.
***
## Saving and Sharing Layouts
Open the CAD menu and go to **Layout**.
| Item | What it does |
| - | - |
| Save layout | Save your current layout under a name. Using an existing name replaces it. |
| Saved Layouts | Load or delete a saved layout. |
| Share layout | Get a code for your current layout. |
| Load layout code | Paste a code someone shared with you. |
| New layout | Create a custom view. Service panels only. |
| Apply Preset | Switch to a ready-made layout. Dispatch only. |
A share code only copies the arrangement of panes, not any calls or units.
***
## Custom Layout Views
On Police, Fire, EMS and DOT, you can add up to 6 extra tabs next to Home and Map. Each has its own name, icon and layout.
Open the CAD menu and click **Layout**, then **New layout**.
Pick an icon and enter a name.
Paste a share code to copy someone else's view. Without one, the view starts from your current layout.
Click **Create Layout**.
Hover a view's tab to edit, share or delete it.
***
## Dispatch Layout Presets
On Dispatch, open **Layout**, then **Apply Preset**, to switch to a ready-made console. See [Dispatch](/CAD/User/dispatch).
| Preset | Layout |
| - | - |
| PSAP Standard | Calls on the left, units above radio groups and Radio Quick-Actions on the right. The default. |
| High Volume | A wide call queue, with units and call history on the right. |
| Supervisor | Calls and call history on the left, units and radio groups on the right. |
| Fire / EMS Radio | Calls, with units, tone board and timers on the right. |
| Full Console | Calls on the left, units and groups at the top, call history and notepad below. |
| Minimal | Calls with a single units column. |
| Calls Only | A full-width call queue. |
***
## Quick Bar Favourites
Favourites are shortcut buttons in the second row of the top bar. Record Search and Records are pinned by default.
Click **⋮** at the end of the bar to see every window you can open, and click a window's star to pin or unpin it. You can also pin a window from its title bar.
| Window | Available |
| - | - |
| Record Search, Records, Penal Code, 10-Codes, Notepad, Run, Live Map, Command Bar, Call History | Always |
| Calls, Active Units, unit groups, Active Lookouts, Tone Board, Signal Manager, Timers | Always |
| Radio | Once you have a unit |
| Radio Quick-Actions, Call Editor | Dispatch only |
***
Still have questions? Join our Discord server for support from the Melonly Team.
This documentation is built and hosted on [Mintlify](https://mintlify.com), a developer documentation platform.
| Panel | Default layout |
| - | - |
| Police, Fire, EMS, DOT | Your assigned call on the left, with Active Units above your unit groups on the right. |
| Dispatch | The PSAP Standard preset. |
| Law | Warrants, licences and bonds cards. |
Unit groups are called Active Squads on Police, Active Apparatus on Fire, Active Rigs on EMS and Active Vehicles on DOT.
Layouts, views and favourites are saved on this device and browser, per panel type. Use a share code to move them to another device.
***
## Split Panes
### Adding a pane
Every pane has an **Add panel** button in its header.
Panels already in your layout are greyed out. Unit groups and Radio Quick-Actions can be added more than once.
Pick a new row above or below, or a new column to the left or right.
### Managing panes
* Drag the dividers between panes to resize them.
* Click **Detach to window** to turn a pane into a floating window, and **Attach to layout** to put it back.
* Click **Close panel** to remove a pane. If you closed your calls pane, click **Restore calls** to bring it back.
What you can add depends on the panel. Most panels offer Run, Records, Calls, Active Units, unit groups, Radio, Tone Board, Signal Manager, Timers, Live Map, Penal Code and 10-Codes. Dispatch adds the Call Editor, Call History and Radio Quick-Actions, and Law adds its hearings, warrants, licences and bonds cards.
The Dispatch call editor can be split into panes too, for example call details next to assigned units. That layout is remembered.
***
## Saving and Sharing Layouts
Open the CAD menu and go to **Layout**.
| Item | What it does |
| - | - |
| Save layout | Save your current layout under a name. Using an existing name replaces it. |
| Saved Layouts | Load or delete a saved layout. |
| Share layout | Get a code for your current layout. |
| Load layout code | Paste a code someone shared with you. |
| New layout | Create a custom view. Service panels only. |
| Apply Preset | Switch to a ready-made layout. Dispatch only. |
A share code only copies the arrangement of panes, not any calls or units.
***
## Custom Layout Views
On Police, Fire, EMS and DOT, you can add up to 6 extra tabs next to Home and Map. Each has its own name, icon and layout.
Open the CAD menu and click **Layout**, then **New layout**.
Pick an icon and enter a name.
Paste a share code to copy someone else's view. Without one, the view starts from your current layout.
Click **Create Layout**.
Hover a view's tab to edit, share or delete it.
***
## Dispatch Layout Presets
On Dispatch, open **Layout**, then **Apply Preset**, to switch to a ready-made console. See [Dispatch](/CAD/User/dispatch).
| Preset | Layout |
| - | - |
| PSAP Standard | Calls on the left, units above radio groups and Radio Quick-Actions on the right. The default. |
| High Volume | A wide call queue, with units and call history on the right. |
| Supervisor | Calls and call history on the left, units and radio groups on the right. |
| Fire / EMS Radio | Calls, with units, tone board and timers on the right. |
| Full Console | Calls on the left, units and groups at the top, call history and notepad below. |
| Minimal | Calls with a single units column. |
| Calls Only | A full-width call queue. |
***
## Quick Bar Favourites
Favourites are shortcut buttons in the second row of the top bar. Record Search and Records are pinned by default.
Click **⋮** at the end of the bar to see every window you can open, and click a window's star to pin or unpin it. You can also pin a window from its title bar.
| Window | Available |
| - | - |
| Record Search, Records, Penal Code, 10-Codes, Notepad, Run, Live Map, Command Bar, Call History | Always |
| Calls, Active Units, unit groups, Active Lookouts, Tone Board, Signal Manager, Timers | Always |
| Radio | Once you have a unit |
| Radio Quick-Actions, Call Editor | Dispatch only |
***
Still have questions? Join our Discord server for support from the Melonly Team.
This documentation is built and hosted on [Mintlify](https://mintlify.com), a developer documentation platform.